
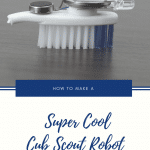
How To Make Super Cool (And Easy) Toothbrush Robots
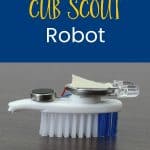
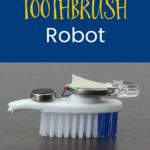
Looking for robot ideas that you can make at home? Learn how to make super cool toothbrush robots with these bristlebot instructions. They’re inexpensive, easy to construct, and lots of fun.
I want to tell you about one of the coolest STEM projects ever–making a toothbrush robot! You’ll find lots of robot ideas on the internet, but none that are as easy as this one is.
These simple robots are perfect for elementary school students. You can make them with your child at home (even as part of a homeschool curriculum), with your class at school, or even with a group of Cub Scouts or Girl Scouts.
The 200 kids at Cub Scout day camp loved making their own robots.
I’ll give you talking points to cover with the kids so they’ll understand how the bristlebots work. You’ll also find a list of supplies you need and step-by-step instructions for putting them together. This will give you a complete set of lesson plans for the activity.
If you would like to have printable instructions for how to make a toothbrush robot, just scroll down to the bottom of the page!
Supplies for Your Toothbrush Robot
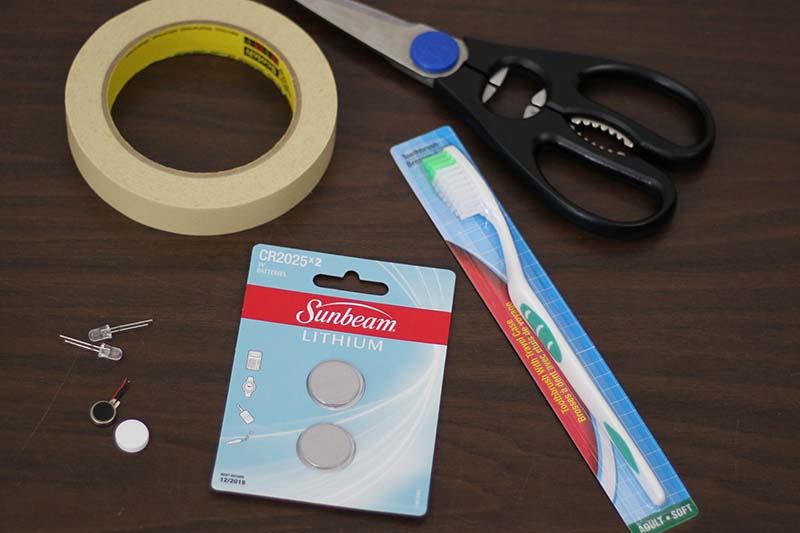
- Toothbrush
- Three-volt coin battery
- 10 mm coin cell phone or pager motor on Amazon or eBay
- 2 – 3 mm flashing LED bulbs
- Double-sided adhesive foam tape circles
- Painter’s or Masking Tape
When you’re purchasing them, make sure you check those toothbrush bristles. The toothbrushes need to have straight bristles that are flat rather than angled. The angled ones will cause the robot to tip over.
The toothbrush heads need to be fairly wide so that the foam pad and the motor will both fit.
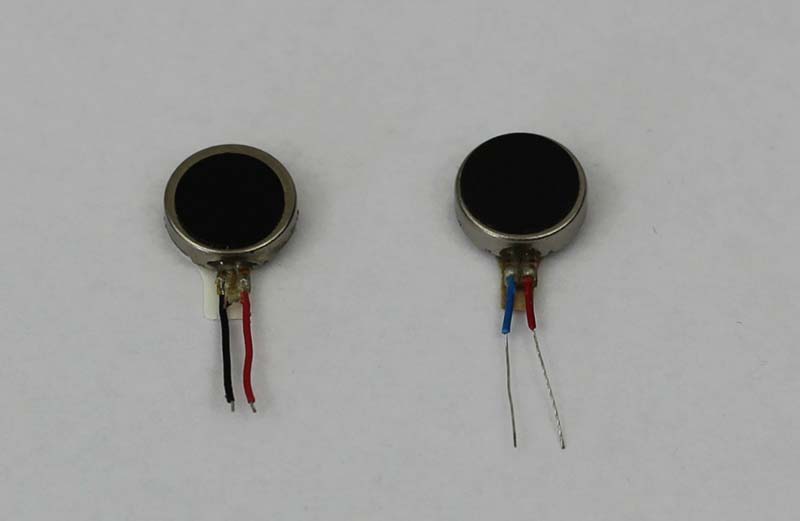
These are the motors that I purchased from Amazon. They’re also available from eBay. One important caution about ordering from eBay: Many of the suppliers are based in China or Hong Kong, and the orders may take several weeks to arrive.
You might be able to remove the motors from old cell phones instead of purchasing them, but that would have made the project more difficult. Depending on the kids’ ages, you might want to try this, but it just wouldn’t have worked for us.
Costs to Make a Toothbrush Robot
Some readers have asked how much it costs for the toothbrush robot supplies. I’ve broken it down below.
Note: Prices are subject to change.
- Toothbrush – 26 cents (package of 35 for $8.99)
- Battery – 25 cents (package of 20 for $4.99)
- Motor – 87 cents each
- Lights – 7 cents each (package of 100 for $6.99)
- Adhesive dots – 1 cent each (package of 672 for $6.96)
This makes them about $1.73 each.
Preparation Prior to Making Bristle Bots
Prior to making bristlebots, you’ll need to do two things.
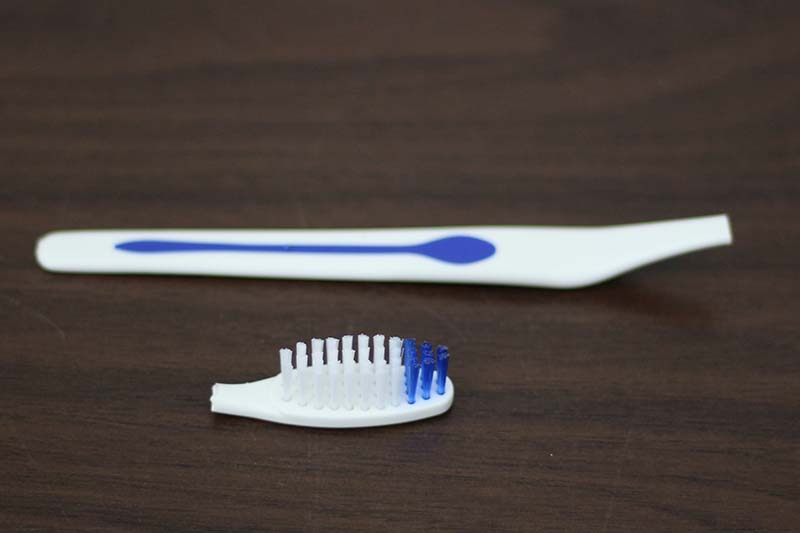
The first step is to cut off the heads of the toothbrushes. They aren’t as difficult to cut as I first thought. They can be cut with kitchen shears or wire cutters. Anything a bit more heavy duty than regular scissors would work.
Second, you need to strip some of the plastic covering from the cell phone motor wire. The ones I bought for my prototype and the ones we bought for camp only had a small amount of wire showing. It wasn’t enough to make contact with the battery.
To me, this was the hardest part. None of our wire strippers were small enough for the job, so I tried carefully cutting around the wire with a craft knife and gently pulling it off. I cut the wire completely off a few times as I was trying to get the hang of it.
One of our day camp volunteers came up with a great technique.
First, he held the wires closest to the motor with pliers. He then rubbed a serrated knife gently across the top of wires then flipped the motor over and did the same thing on the bottom. Finally, he used tweezers to pull the plastic off. His great idea worked perfectly!
We put all of the supplies for one robot into a plastic baggie. This saved us a little time when passing out robot supplies to our Scouts.
Note: If you have younger siblings around when you make these, don’t forget that the small parts are a possible chocking hazard
Discussion Prior to Building the Robots
There are a few things that you’ll want the kids to understand about how these toothbrush robots work. This is especially important if you’re using this as a STEM project.
Start by asking the children if they know anyone who has put their mobile phone on vibrate. Explain that the little motors in their packages are what makes the phone vibrate and that they’ll make the robots move.
Help them understand that the wires on the motor need to be handled gently and carefully to avoid breaking them.
Ask the kids what would happen if they put batteries into their game controller the wrong way. This will help start a discussion about the positive and negative sides of the battery.
We talked about the positive and negative wires on the motor and on the LED bulbs. The positive wire “leg” on the bulb is longer than the negative wire.
Assembly of the Toothbrush Robot
Here are the steps we took to assemble our bristlebots.
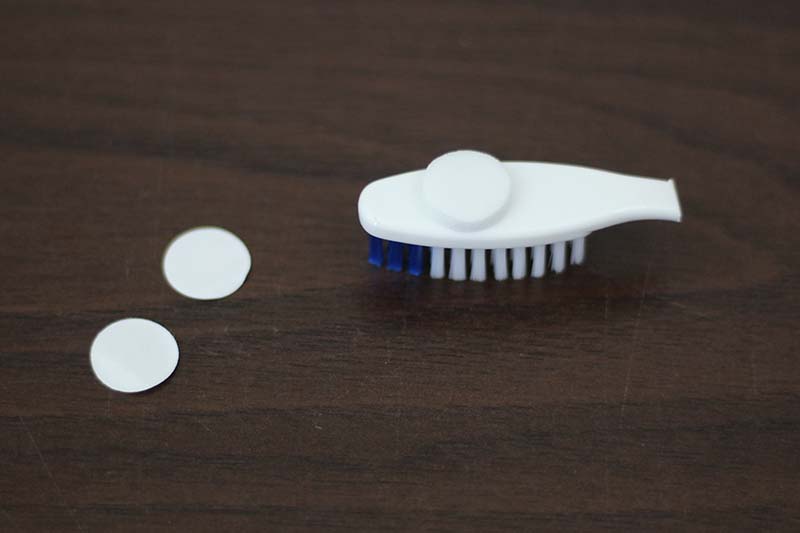
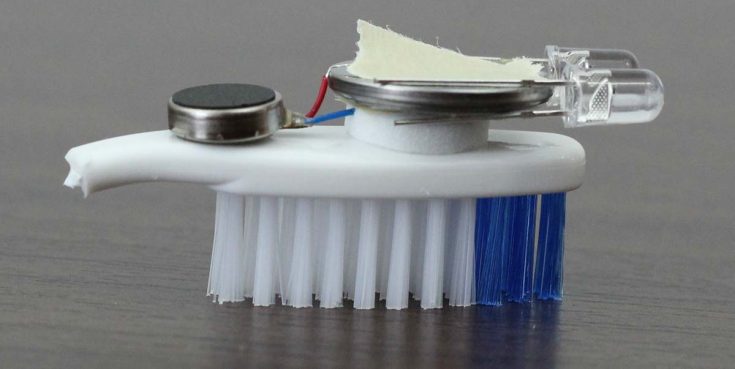
1. Peel the backing from one side of adhesive foam pad and stick it onto toothbrush. It should be toward the end of toothbrush back opposite of where the handle was.
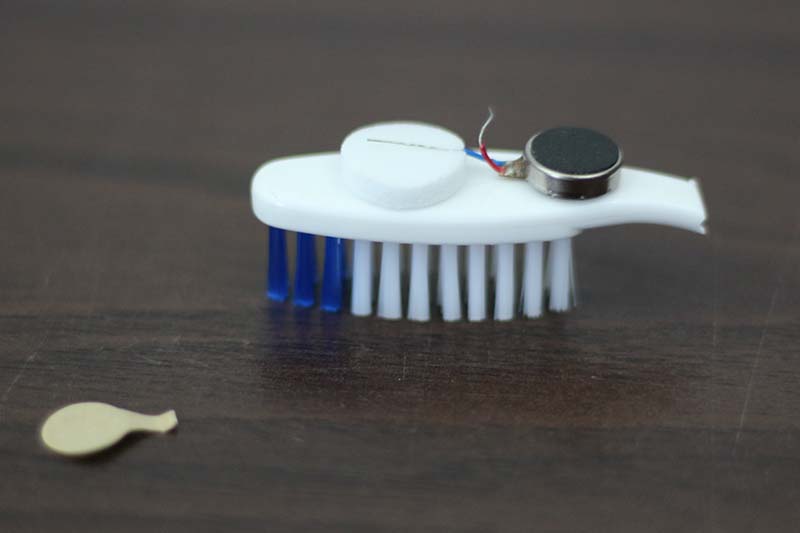
2. Peel the backing from the motor and stick it onto the back of toothbrush (where the handle was) with the wires facing the foam pad.
3. Separate the wires. Bend the positive wire up and gently press the negative wire onto the top of the adhesive pad.
Our motors had the usual positive red wire, but the negative wire was blue rather than the typical black.
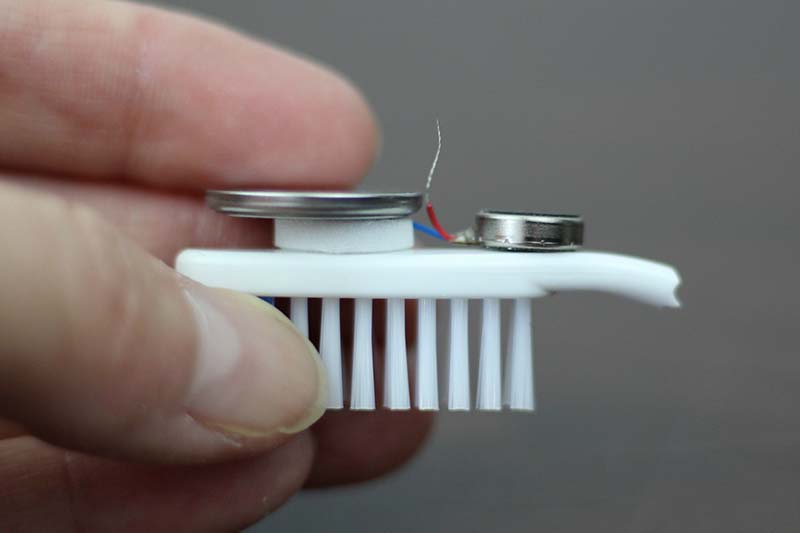
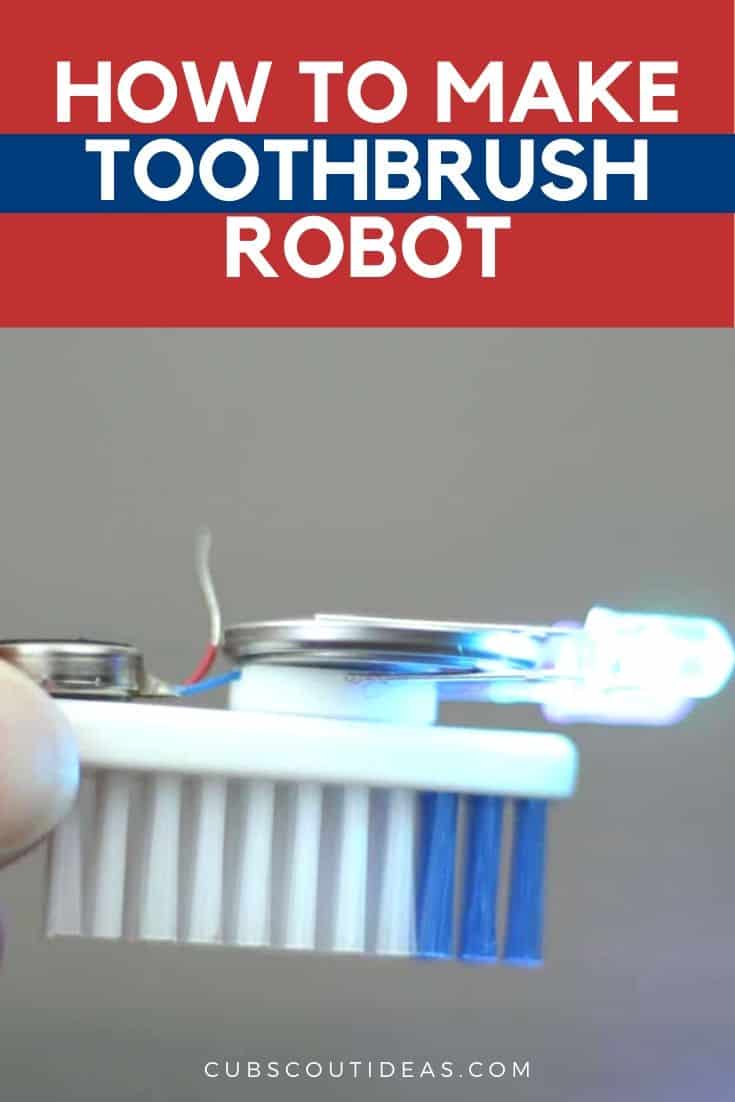
4. Place the battery on top of the adhesive pad with the positive side up. Depending on how close the red wire is to the top of the battery, some of the Cubs will feel their robots vibrating. They get so excited about this!
The kids whose robots aren’t vibrating get a little worried when their buddy’s is. So, I quickly explained that all they need to do is to make the red wire touch the top of the battery to get their vibrating motor going.
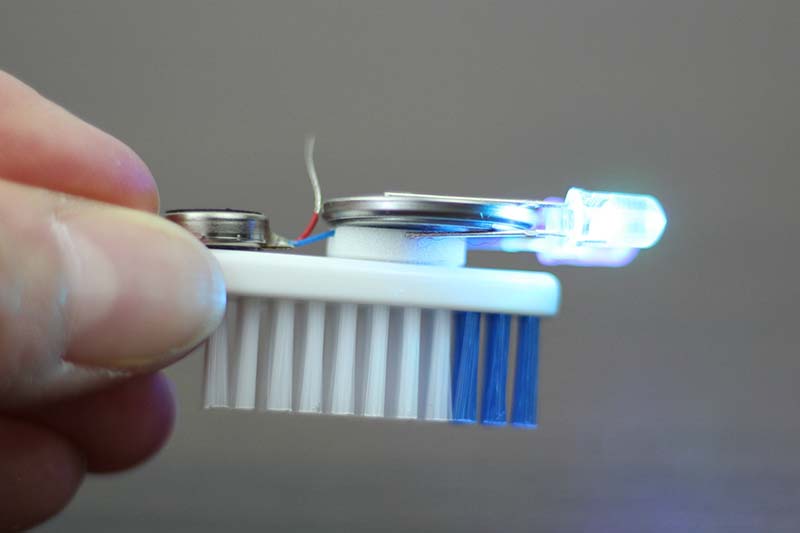
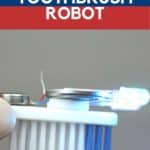
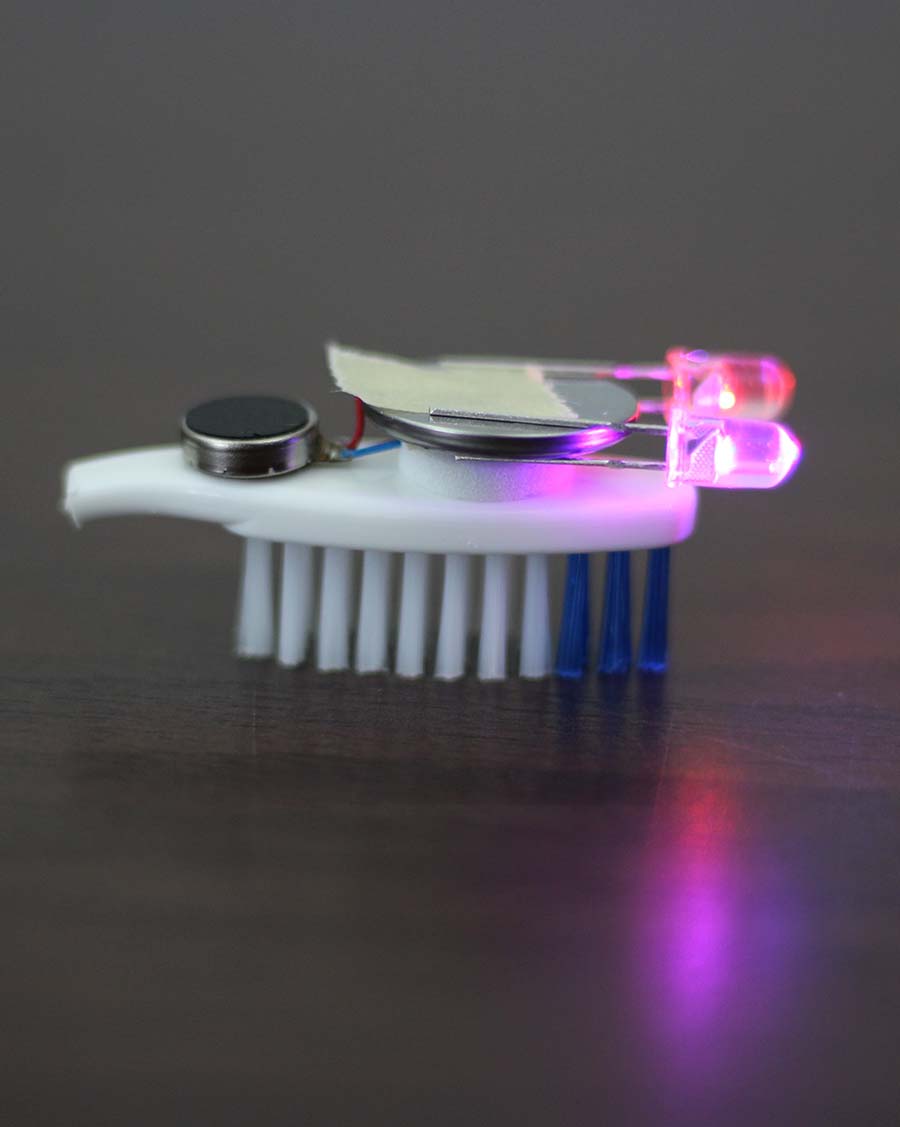
5. To add the “eyes”, slide the LED bulbs onto the sides of the battery with the bulbs at the front of the toothbrush (the opposite side from the motor). The short “legs” (negative side) should be on the bottom. You can use googly eyes instead of LED bulbs, but I think it would take away some of the “cool” factor.
6. Using painter’s or masking tape, tape the positive wire down onto the battery, and watch the robot go!
When the kids are finished playing with their robots, remove the LED bulbs. Remove the tape, and bend the red wire up.
Place the tape back onto the battery so that the red wire can’t touch it. This will keep the battery from running down.
At our Cub Scout day camp, we had them put the Scout robots into the baggies that held their bristlebot kit. This made it easier to take them home.
Retired Cub Scout Robotics Adventure
Why did we make toothbrush robots at a Cub Scout day camp? It was a great exploration of simple robotics. At the time, Bears had a Robotics adventure where they had to build a robot. Even though
As I searched for an inexpensive way for the Scouts to build homemade robots, I found many tutorials for building bristle bots, but they all required soldering the wires. I was happy when I found this cool robot design because we didn’t have to solder to make a micro robot.
If your Scouts enjoy this activity, they’ll love making this cool robot hand too!
Playing with the Bristlebots
It really doesn’t take long to assemble a toothbrush robot, so we knew the day camp attendees would have time to play with their micro bots. The Scouts had a few options, thanks to the wonderful Scouts BSA volunteers who were assisting me!
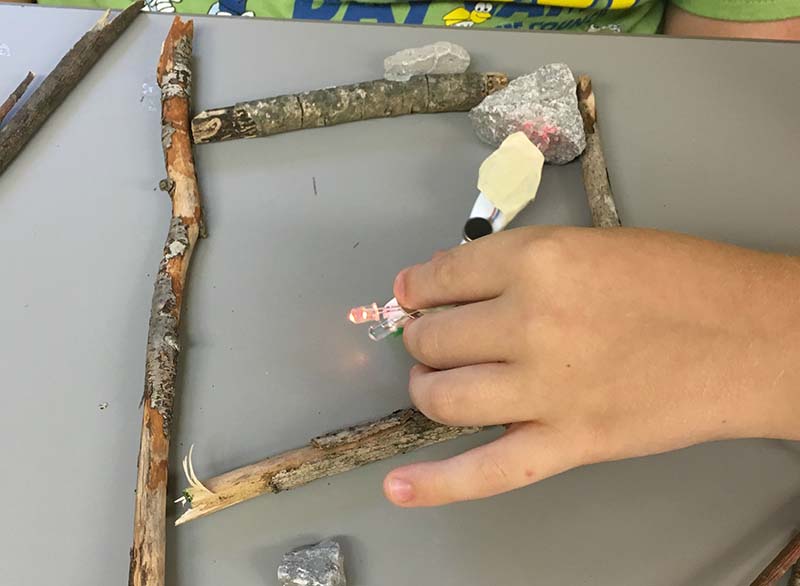
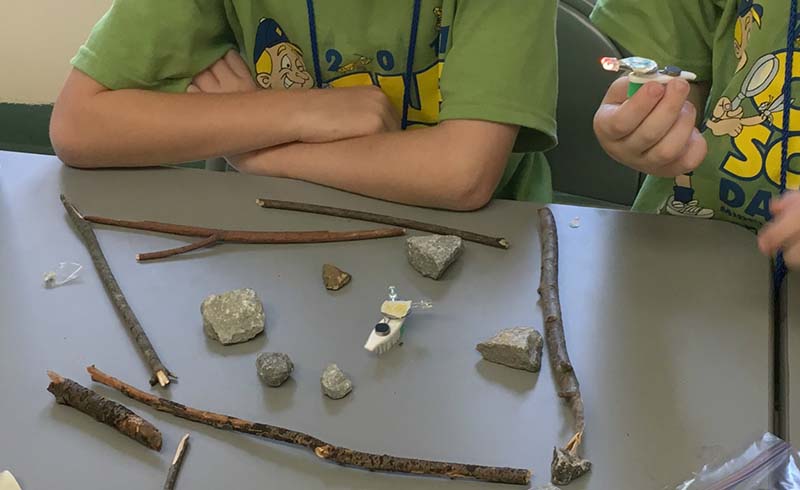
Originally, we were just going to give them some sticks to build a “battle arena” for the bristlebots and some rocks to use as obstacles. They could pair up and battle each other in the small tabletop arena.
But Jamie, Eli, and J.B. (the Scouts BSA helping me) came up with two other great ideas for our tiny battling bots!
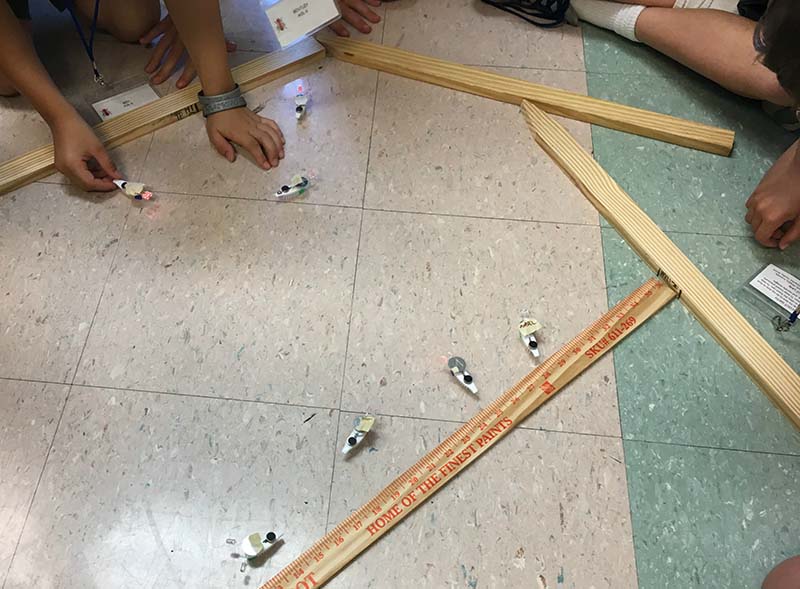
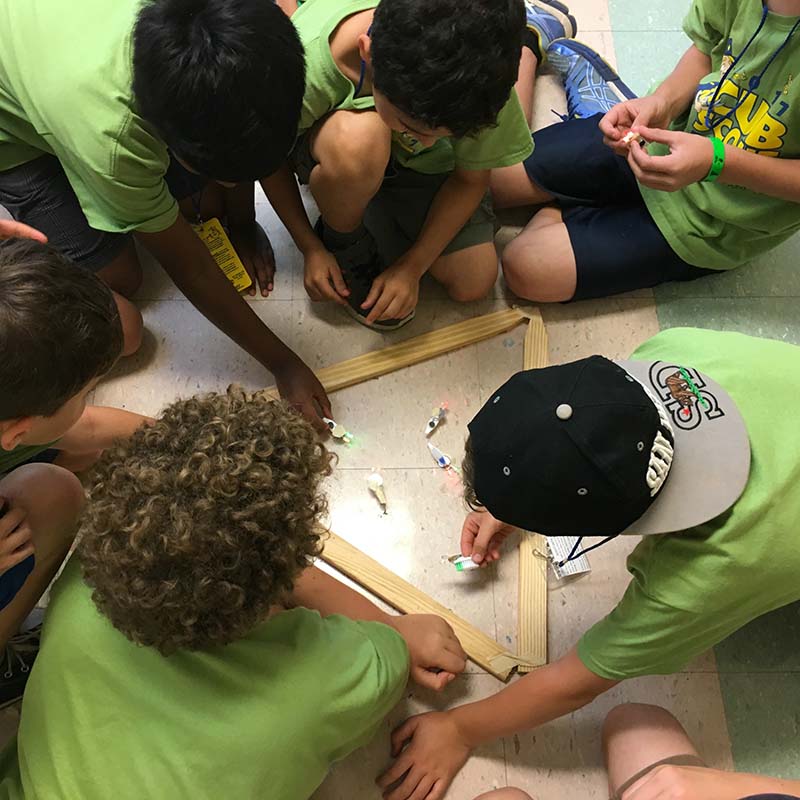
Using yardsticks and lawn stakes, the Boy Scouts built a big arena on the floor. This allowed several Cub Scouts to battle at the same time, and it was awesome! The kids had a ton of fun.
The Scouts also built an epic bot race track. The big twist was that they added quite a few rocks as obstacles. Even if your bot was an inch away from the finish line, you might still lose if your bot bumped into a rock and turned around. It would head back toward the start line!
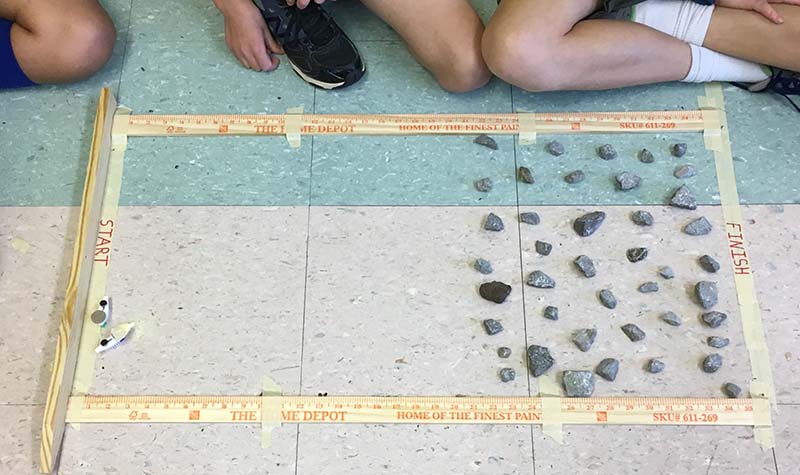
These additions really made the activity so much more fun! Thanks to Jamie, Eli, and J.B. for these awesome ideas!
What do you think about this? Will your Cub Scouts love this fun little science project making these bristle robots?
How to Make Cub Scout Robots
Use just a few supplies to create a robot similar to a bristlebot. They're fun and easy for the kids to make. And there's no soldering involved! These are perfect for the Bear Cub Scout Robotics adventure.
Materials
Tools
- For Preparation:
- Kitchen Shears or Wire Cutters
- Pliers
- Serrated Knife
- Tweezers
Instructions
- Cut the heads off of the toothbrushes using kitchen shears or wire cutters.
- Strip some of the plastic covering from the wires on the cell phone motor.
- Peel the backing from one side of adhesive foam pad and stick it onto toothbrush. It should be toward the end of toothbrush back opposite of where the handle was.
- Peel the backing from the motor and stick it onto the back of toothbrush (where the handle was) with the wires facing the foam pad.
- Separate the wires. Bend the positive wire up and gently press the negative wire onto the top of the adhesive pad.
- Place the battery on top of the adhesive pad with the positive side up.
- To add the “eyes”, slide the LED bulbs onto the sides of the battery with the bulbs at the front of the toothbrush (the opposite side from the motor). The short “legs” (negative side) should be on the bottom.
- Using painter’s or masking tape, tape the positive wire down onto the battery, and watch the robot go!
Notes
Use caution when stripping the plastic off of the wires on the motor. It's easy to pull or cut them off.
Yours in Scouting,
Sherry
P.S. Check out all of the STEM activities for Cub Scouts!

33 responses
-
1
-
1
-
Thank you for this informative and detailed tutorial for making the toothbrush robots. Our Cub Scouts will be making these at an upcoming meeting, and I know they will have a blast assembling them and competing in an obstacle course. Not only did you provide pictures of each step and all the supplies, but you showed how the bots could be used to navigate an obstacle course and get to the finish line first or battle one on one. The only suggestion I have for the supply list is to recommend either medium firm toothbrush bristles or firm. I bought soft bristle brushes and couldn’t get them to move. Once I switched to medium firm toothbrushes, the sample robot I made was zipping all around the obstacle course. Thank you so much for taking time to create this tutorial!
-
Do the toothbrushes need to have stiff bristles? The soft bristle toothbrushes I bought won’t move.
-
I found the easiest way to remove the cover from the motor wires was to burn off an inch or so from the end using a bbq lighter (one second of flame on the wire and the burned portion slides right off). Was having no success with the method stated here (my shortcoming).
-
[…] This craft was inspired by this post by Cub Scout Ideas […]
-
[…] your post is a how to (like how to make robots out of toothbrushes), the Schema markup will tell Google, “Hey, this post tells people how to make toothbrush […]
-
These are perfect!!! I did have one suggestion on stripping the wires that makes quick work of it. We just took a lighter and quickly past it under the wire to heat the plastic on each wire and used our finger nails to grab and pull it off. Very quick and easy and didn’t hurt the wires at all.
-
[…] of my posts is How To Make Super Cool (And Easy) Cub Scout Robots, and it was doing well on Pinterest but not on […]
Leave a Reply