
- Cub Scout Activities
- |
- Cub Scout Arrow of Light Adventures & Requirements
- |
- Cub Scout Bears Adventures & Requirements
- |
- Cub Scout Tigers Adventures & Requirements
- |
- Cub Scout Webelos Adventures & Requirements
Cub Scouts Birdhouse Plans

Building a birdhouse is such a great opportunity for our all of our Cub Scouts. They learn about taking something simple, such as wood, and turning it into something useful. They learn about using tools safely. And they learn about helping other creatures.
In the new Cub Scout Adventure program, there are several ranks that can build a birdhouse to complete an adventure.
Bear Adventure – Baloo the Builder 5: Build your project.
Webelos Elective Adventure – Build It 4: Build your carpentry project.
There are two ways that you can do this:
1) By purchasing a birdhouse kit, or
2) By buying and cutting the wood yourself.
Buying the kit is more expensive, but the wood is precut for you. Doing it yourself is less expensive, but you have to do more work.
If you decide to do it yourself, take advantage of my free birdhouse plans.
DIY Supply List:
5 feet of 1- x 6-inch board cut into the following pieces (see diagram below):
2 – 10” pieces
1 – 7 ¾” pieces
2 – angled pieces 10″ on one side & 8″ on the other
1 – 4” piece

You’ll also need
1 5/8-inch galvanized deck screws
2-inch galvanized finishing nails
Fine sandpaper
Wood glue
Building Instructions:
Assemble the birdhouse as shown in this drawing. Step-by-step instructions are below.
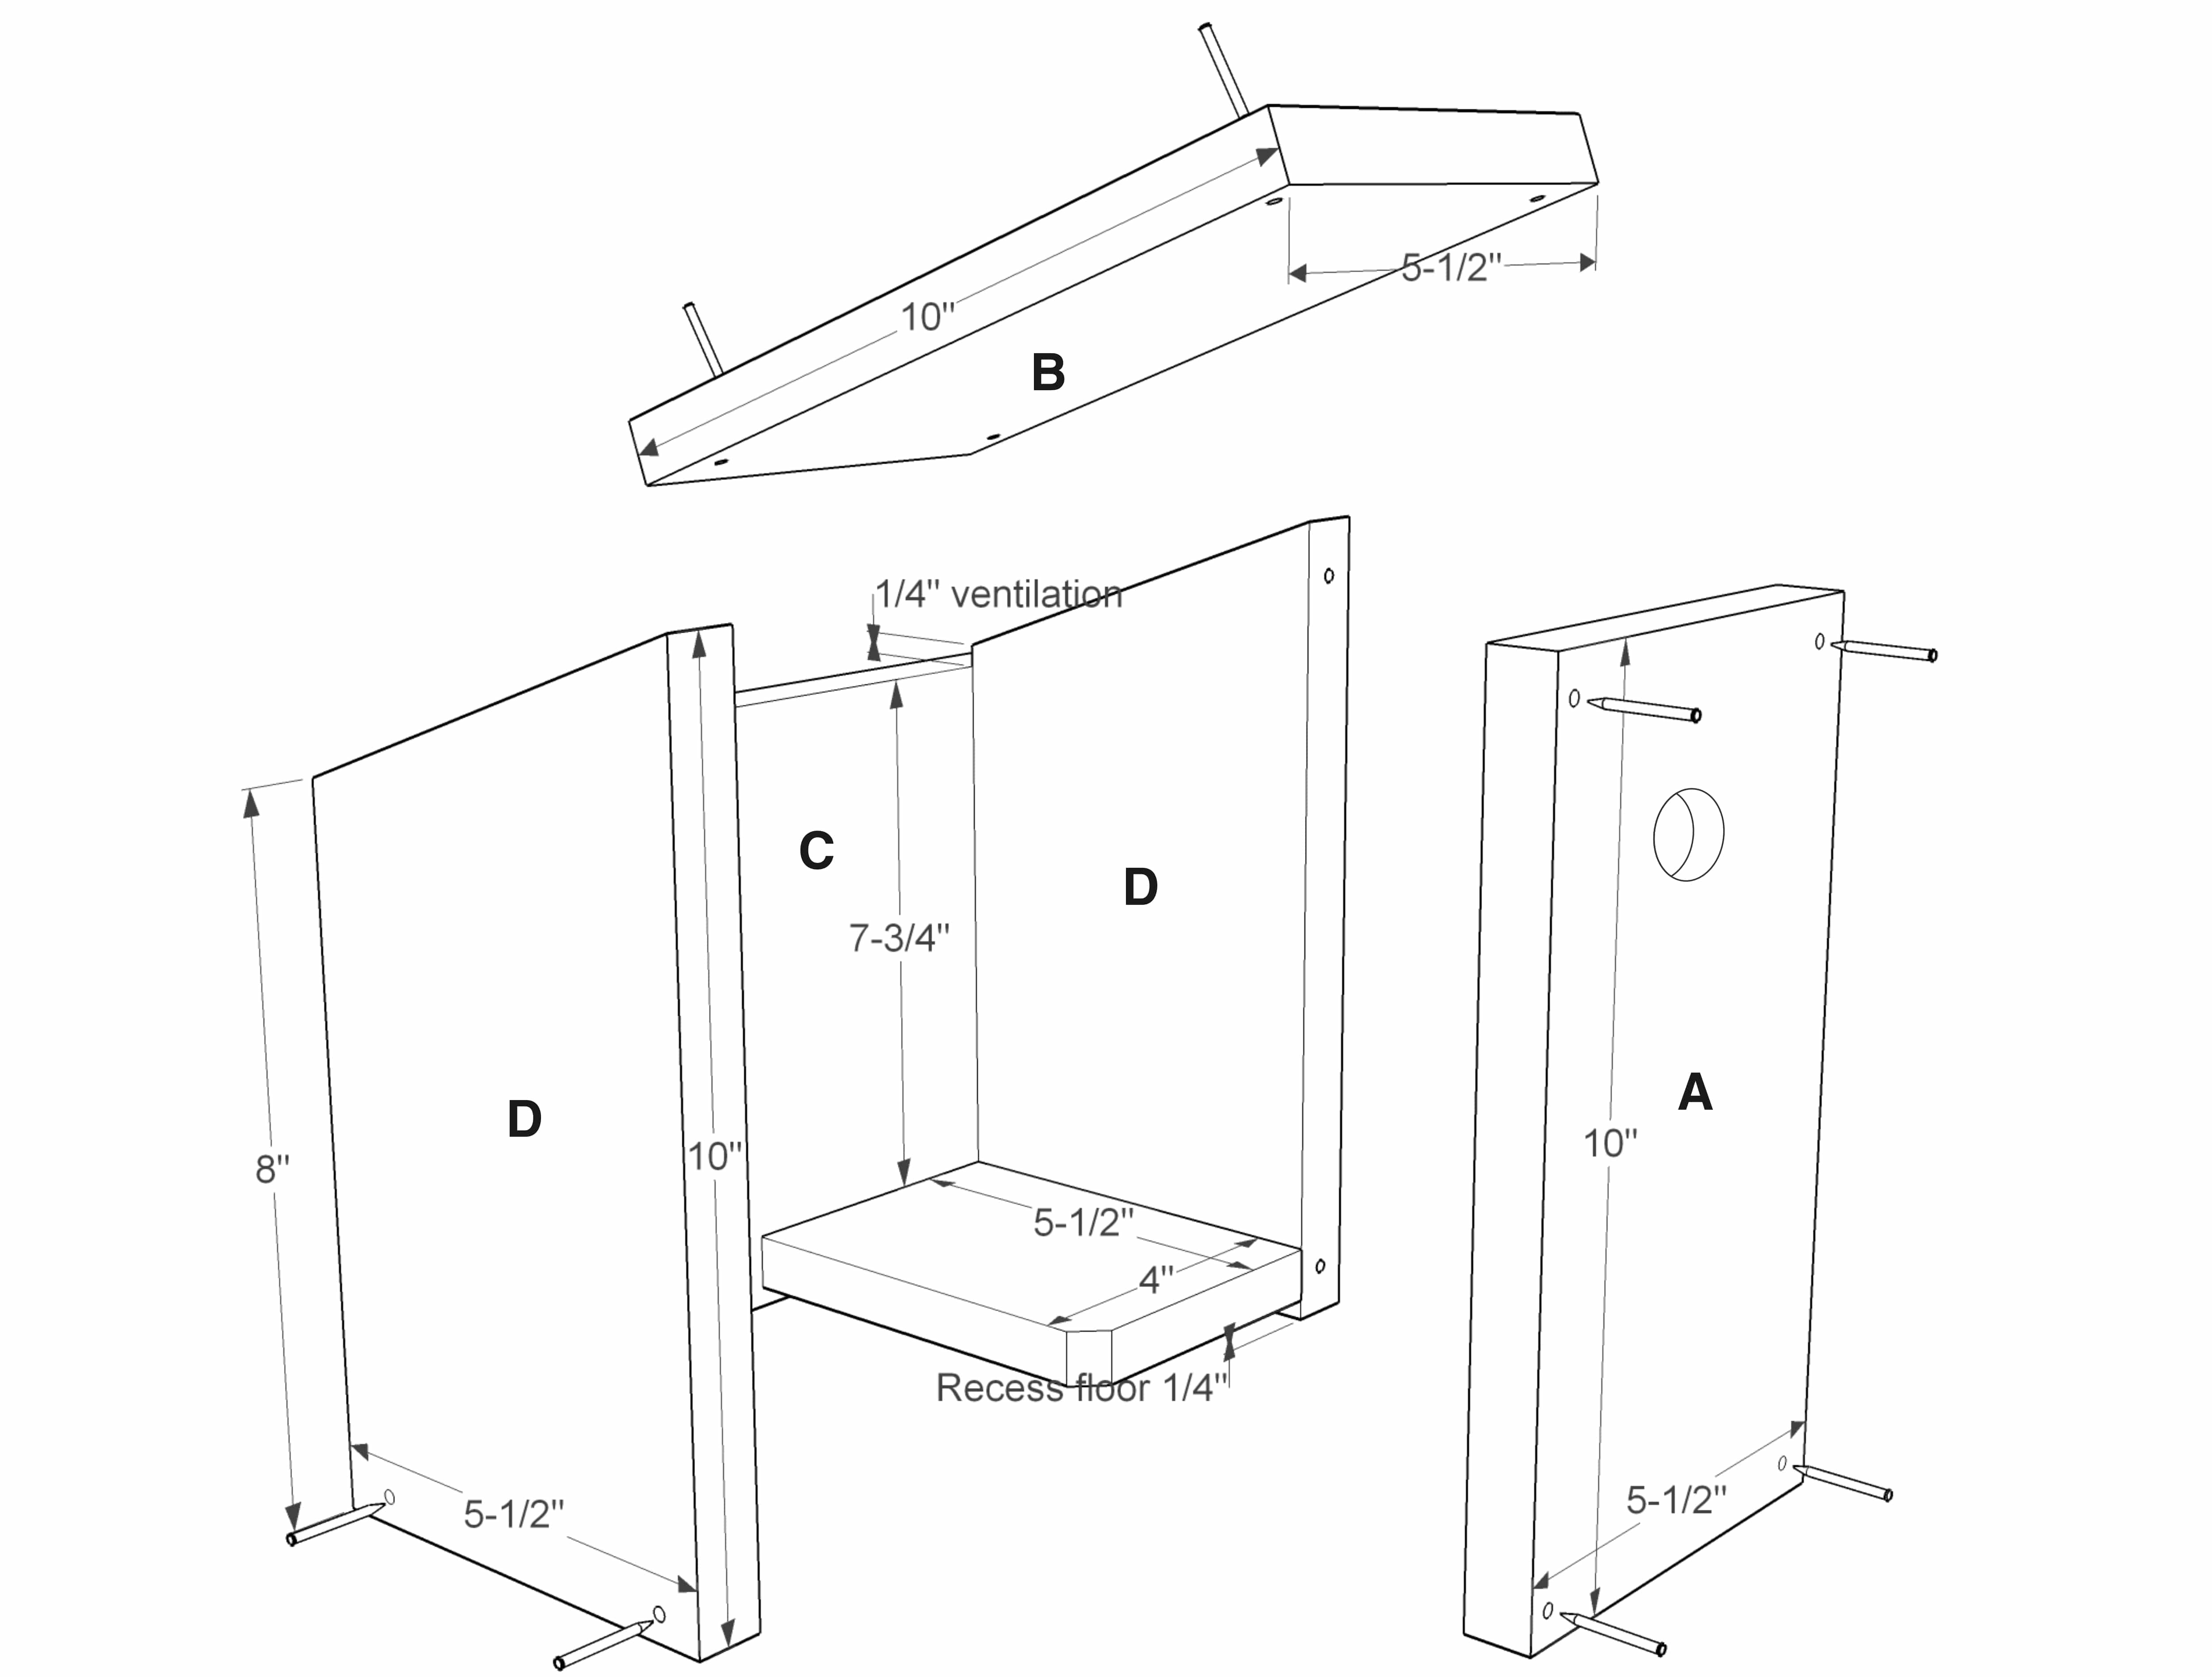
1. Precut a board for each boy following the first diagr
am.
2. Drill the entrance hole about 2 ½” from the top of the front piece. The hole should be about 1 ½” in diameter. Make sure the hole is centered on the board. Unless you have a manual hand drill and a lot of time for the boys to crank the drill, you’ll probably want to predrill the hole.
3. Attach the front to the sides by using the 1 5/8” deck screws. You might want to predrill holes in the front piece to make it easier for the boys.
4. Attach the back to the sides with the 2” finishing nails. The holes for the nails can also be predrilled.
5. Cut about ½” off each corner of the floor for drainage.
6. Attach the floor about ¼” up from the bottom of the house on the sides and back with the 2” finishing nails. Don’t nail the floor from the front because you won’t be able to open it for cleaning.
7. Attach the roof to the sides with 1-5/8-inch deck screws.
8. Hang your birdhouse outside, and watch for the new occupants to settle in!
Yours in Scouting,
Sherry
P.S. Want to identify the birds that are living in the birdhouse? Read about the Ultimate Guide to Bird Identification. Do you want to make a treat for them too? My Bird Feeders for Kids to Make series shows you three easy-to-make bird feeder styles.
15 responses
-
Never make smooth sides in a nest box. Never use a plane or sandpaper. The sides must be rough so that the baby birds can grab hold with their pointed claws when they have to climb out. A nest box with smooth sides is a bird trap.
-
[…] If your Cub Scout wants to build one, I have birdhouse plans on here […]
-
[…] Tigers – Birdhouse […]
-
[…] Tigers – Birdhouse […]
Leave a Reply