


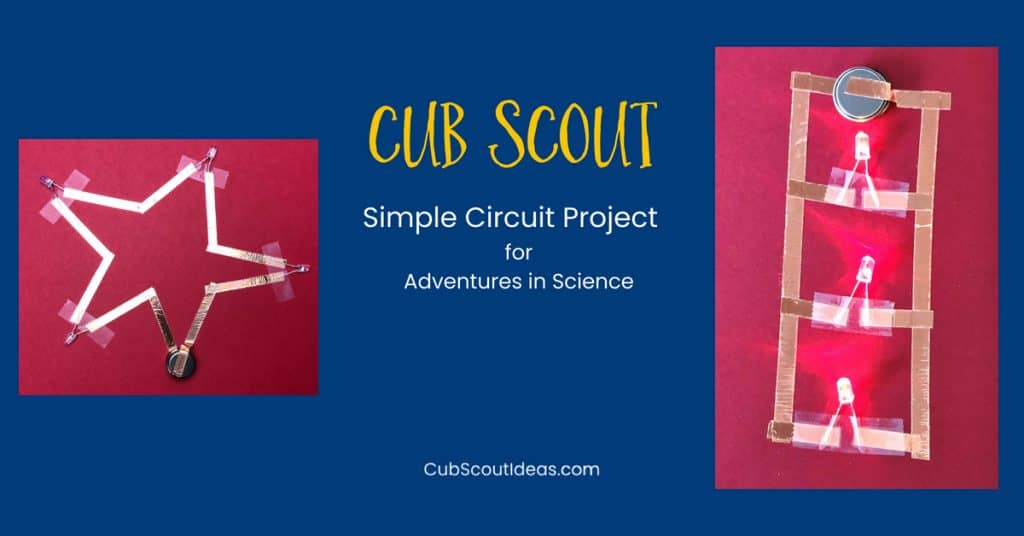
I have a simple circuit project to share with your Cub Scout! This one is so easy–no stripping wires! Instead, it uses copper tape. Read on to find out what that is!

When my older son was a Webelos, we did a similar circuit project for the old Engineer Activity Badge. We used a flashlight from Dollar Tree for the light bulb, and we purchased our battery there too. We used regular light switches that you can get at Home Depot. We had to strip the plastic coating from wire which is easier said than done–at least for me!
This simple circuit project for kids is much easier than that one was!
Before I share the activity, let's learn a little about circuits.
What are Circuits?
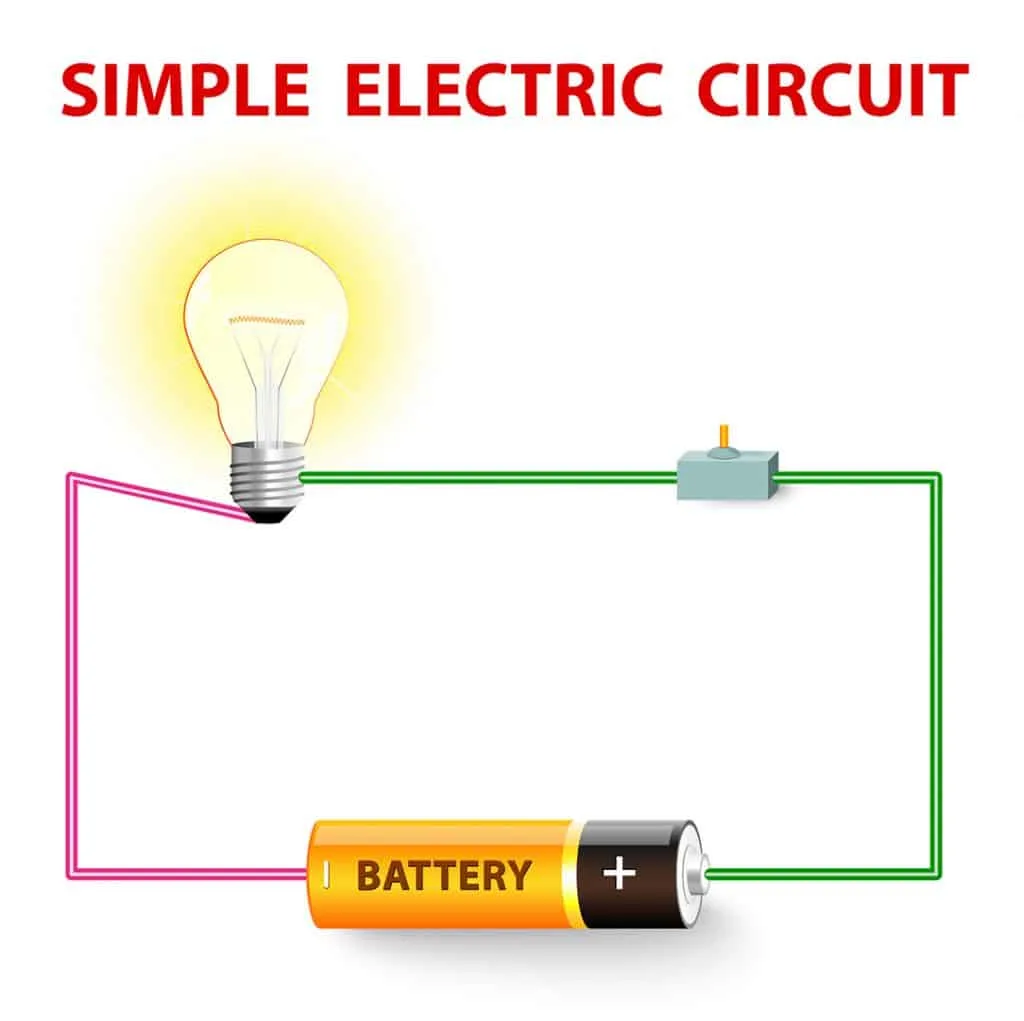
An electrical circuit is simply the path that electricity flows through. You'll hear the terms open and closed circuit.
A closed circuit means that the path starts at the power source (like a battery), flows through the path, and ends up back at the power source. To use that electricity to power something like a light bulb, you have to have a closed circuit.
An open circuit means the path is broken so that the electricity can't flow back to the power source. Your light bulb won't light up if there's an open circuit.
When the light is turned on in your kitchen, you have a closed circuit. When you flip the switch to turn it off, it breaks that path and becomes an open circuit.

Difference Between Parallel & Series Circuits
A series circuit means that there are several light bulbs in a row. (Technically, they're called “components” since they can be any kind of electrically powered device, but I'm using the term “light bulb” to make it simple.)
The electricity starts at the power supply or battery, flows through the first light bulb, then the second, then the third, and then flows back to the power supply.
A parallel circuit has “branches.” So, there might be a long path, but along the way, there are branches that are off the main path. Each of those individual branches runs through a light bulb then goes back to the power supply.
When one of the light bulbs in a series circuit is removed or broken, it becomes an open circuit, and nothing works anymore.
Anyone remember when the strands of Christmas lights were on a series circuit? One of the light bulbs would burn out, and the entire strand would turn off!
When one of the light bulbs in a parallel circuit goes out, the rest of them keep burning. That's because each branch has its own closed circuit back to the power supply.
Our houses are wired this way. You wouldn't want all of your lights to go out in your house just because the bathroom light bulb burned out!
Simple Circuit Project for Kids
Earlier, I mentioned that we had to strip the plastic coating from the wire when my older son did a similar project. Well, I found the coolest product that will eliminate that!
Copper tape. I had never even heard of it, but I ran across a blog post that mentioned using it for this purpose. I think it's some kind of rodent repellent, but I have no idea how that works.
Supplies Needed for Circuit Project
Cardstock
Copper Tape
3mm LED Bulbs
3 Volt Coin Batteries
Scotch Tape
How to Make a Simple Circuit
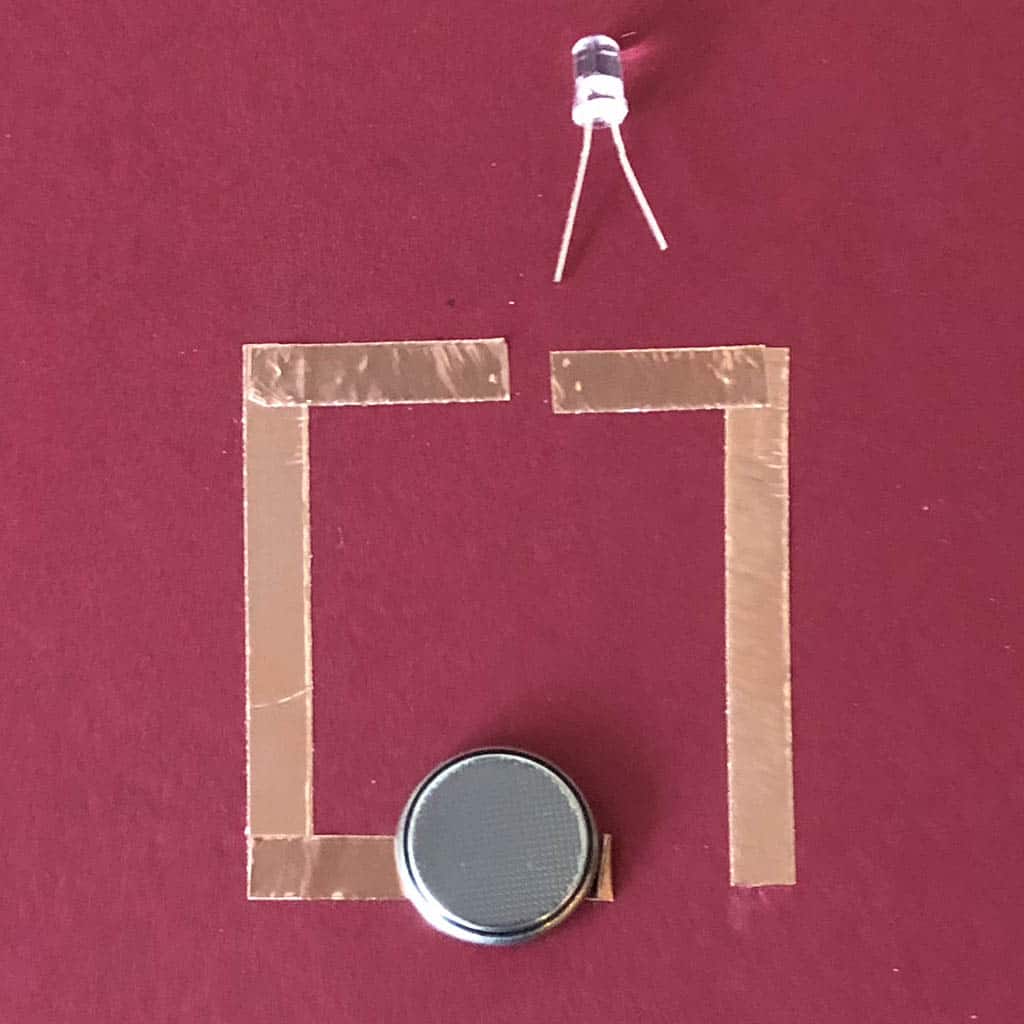
To help the Scouts understand how it works, start out by making a simple circuit. I made mine in a square shape.
Cut 3 strips of copper tape. You can make them any length. For my first one, I cut them about 3″ or 3 1/2″ long.
Then cut two shorter strips. Mine were about 1 1/4″ long.
Peel the paper backing from the first long piece of the tape, and stick it to the paper. Repeat with another long strip, but make sure it overlaps the end of the first piece to form an L shape.
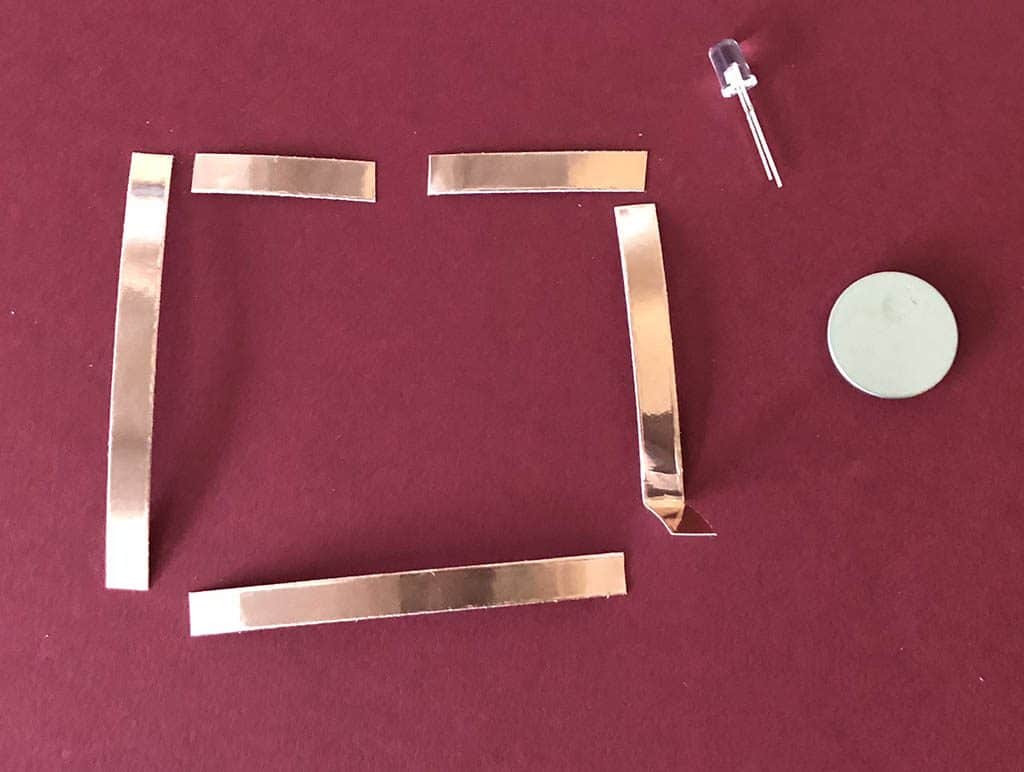
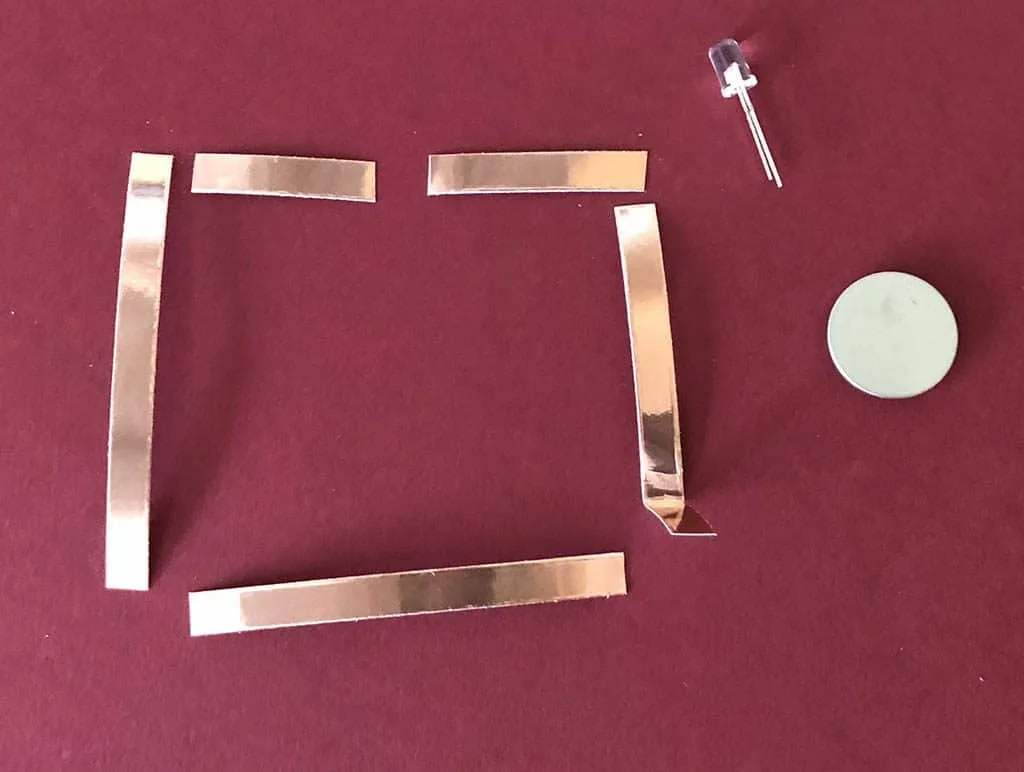
At the other end of the first strip, attach one of the short pieces. Put the second short piece on the paper in a line with the first short piece, but leave a gap of about 1/2″.
Apply the third long piece to make a square, but don't press the tape down yet. You don't want it to touch the last corner. This is where your battery will go.
I used flashing LED bulbs and button batteries that I had left over from the toothbrush robots that we made at day camp last summer.
It's always good to make sure your battery and bulb work. Just slide the battery between the two wires on the bulb. The longer wire is the positive one, so make sure it's on the side of the battery with the plus sign.
Next, put the battery on the tape that isn't attached yet. Next, slightly pull the battery legs apart. Place the battery so that one leg is touching each piece of the short tape. Hold down the legs with one hand, and flip the battery over so that the bottom is touching the attached tape.
If your bulb doesn't light up, look at the battery. Do you have the positive side up? If so, follow that piece of tape until you get to the gap. The positive leg (the longer one) should be on that same side as the gap. I hope that makes sense! ?

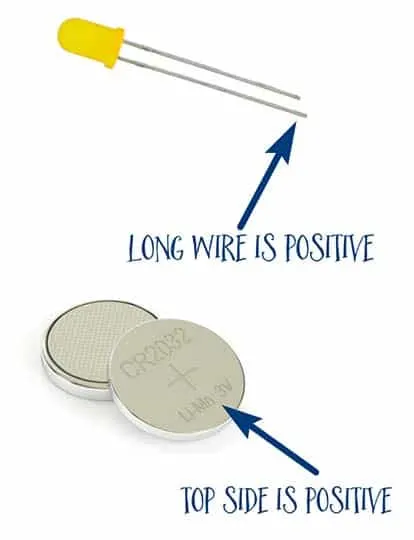
Another thing to do is just flip the bulb around so that the legs are switched.
If your bulb lights up, you can tape down the legs with a piece of scotch tape. To open your circuit, you can flip the battery back and forth.
One thing I figured out was that if you press the battery down pretty hard, you may not have to hold it to keep the light burning.
Series Circuit
The requirement says to use three bulbs to make your series circuit. You'll do the same thing that you did when you made the square with one bulb–just leave a gap between the tape for the bulb.
Instead of a straight line, I made a star! Well, that's supposed to be a star.
I used four bulbs on four of the five points and put the battery on the fifth point.
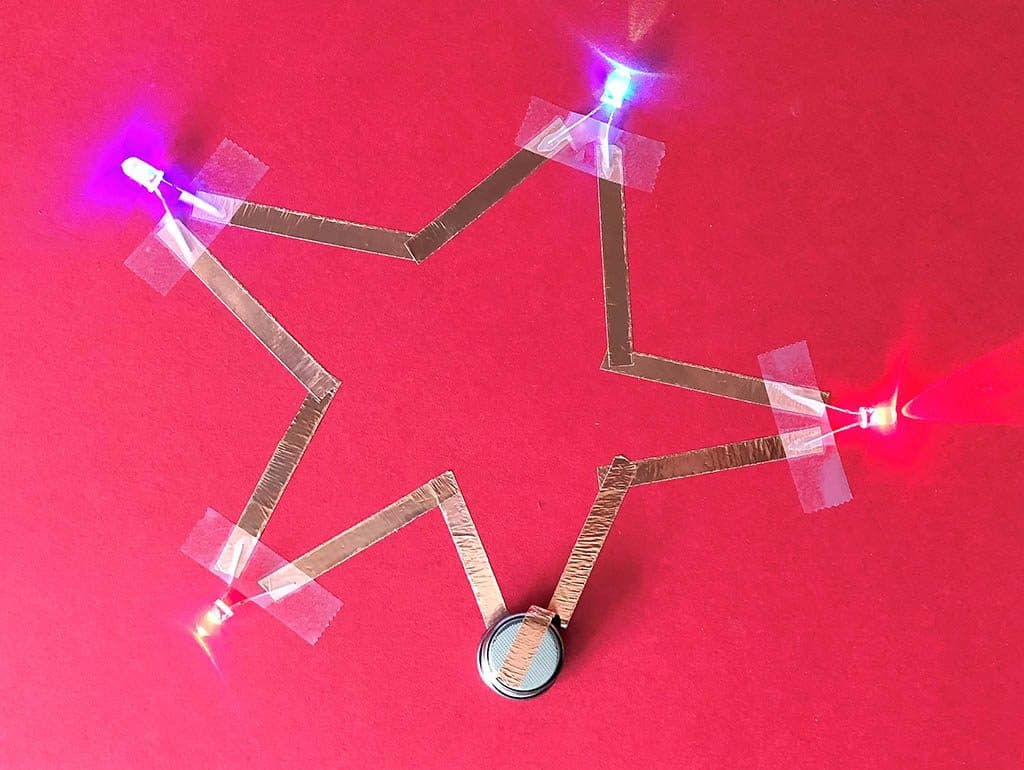

You'll find that a series circuit won't light up with just one battery. I had the best results using three batteries stacked on top of each other.
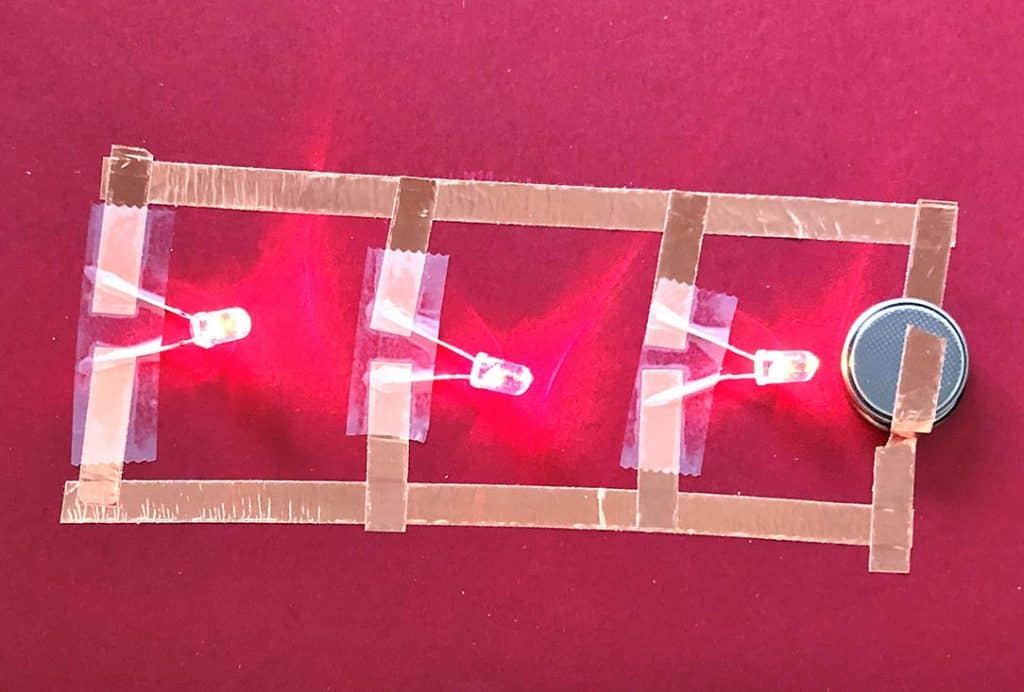
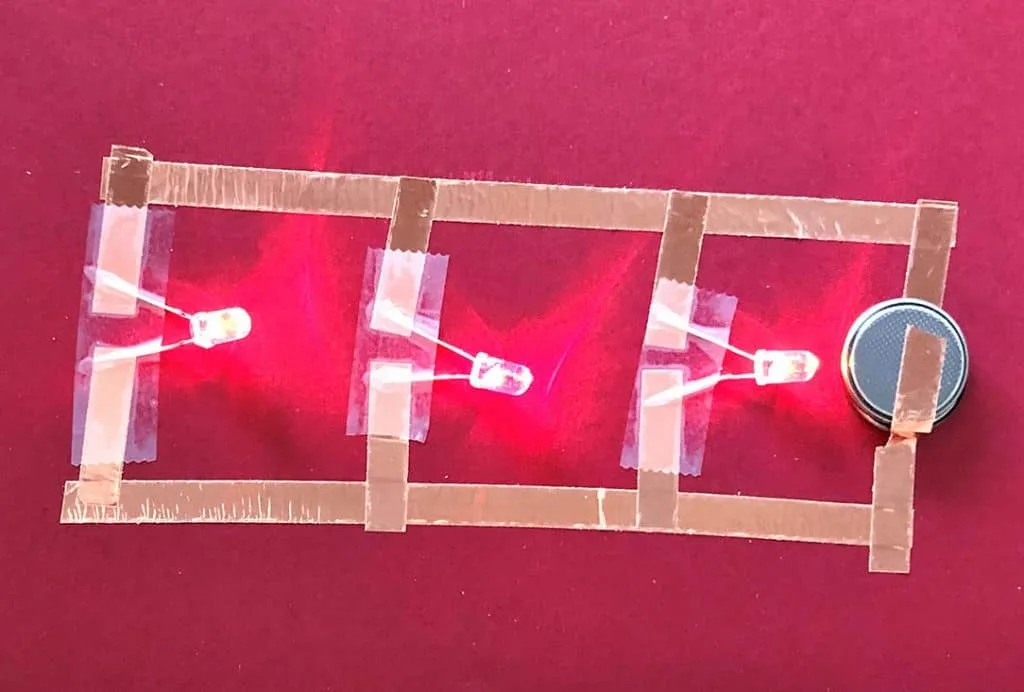
Parallel Circuit
For the parallel circuit, I used two long strips of copper tape and eight short ones. Arrange them so that it looks like a ladder that's been cut down the center of the rungs.
Unlike the series circuit, one battery will work for the parallel circuit. Add a second battery, and you'll have super bright lights!
Have the Scouts use their imaginations to come up with other shapes they can make with this project.
Need to buy the supplies for this circuit project? Find them in my Amazon shop!
What do you think? Way simpler than stripping wire! Let me know what shapes your Scouts make.
Yours in Scouting,
Sherry

Julie
Friday 21st of January 2022
Thank you so much for this! I was envisioning lots of wires and taping and fumbling with flashlight lightbulbs... using this copper tape and little leds looks so much easier. I'm now looking forward to leading this adventure next month so much more!
Heather Kokalj
Sunday 5th of January 2020
How do you stack the batteries is it positive on positive?
Gary M Bush
Tuesday 11th of December 2018
Duh! I knew I had read it, but failed to see it again. One must read and then re-read before posting. Sorry about that. You already answered my question. 3 batteries worked for you. I shall try again. Thanks again.
Sherry Smothermon-Short
Wednesday 12th of December 2018
Gary, thanks for your kind words! Glad you figured out how many batteries. :)
Gary M Bush
Tuesday 11th of December 2018
Question: How many batteries did you use in your star series circuit? I am having a dickens of a time getting my series circuit to light up. I have tried using 2, 3 and 4 batteries. Any help would be appreciated.
So glad I stumbled upon your site. Very helpful.
SandyK
Friday 30th of November 2018
Curious, why use scotch tape rather than electrical tape?
Sherry Smothermon-Short
Wednesday 12th of December 2018
To be honest, I didn't even think about electrical tape. I still think I would stick with Scotch tape since it's transparent. If you try it with electrical tape, could you let me know how it goes?
Thanks for reading!