

Learn how to make a solar hot dog cooker from a Pringles can! Super fun and easy project for kids. Perfect STEM activity for Cub Scouts.
At your next den meeting, teach your Scouts how to make a solar hot dog cooker from a Pringles can. The DIY solar oven is a quick and fun project that not only gets kids working together but also gets them outdoors as they test out their cooker and adjust it as necessary.
With a few easy supplies and some adult supervision, this project can be completed in about 30-minutes and involves most young kids' favorite pastime; eating. It's a win-win, all the way around.
Supplies Needed to Make a Pringles Can Hot Dog Cooker
- Pringles can
- Wooden Skewer
- Ruler
- Hammer
- Nail
- Glue Gun and Glue Stick
- Scissors or Exacto Knife
- Sharpie Marker
- Masking Tape
- Aluminum Foil
- Cling Wrap
- Hot Dogs
How to Make a Hot Dog Cooker From a Pringles Can
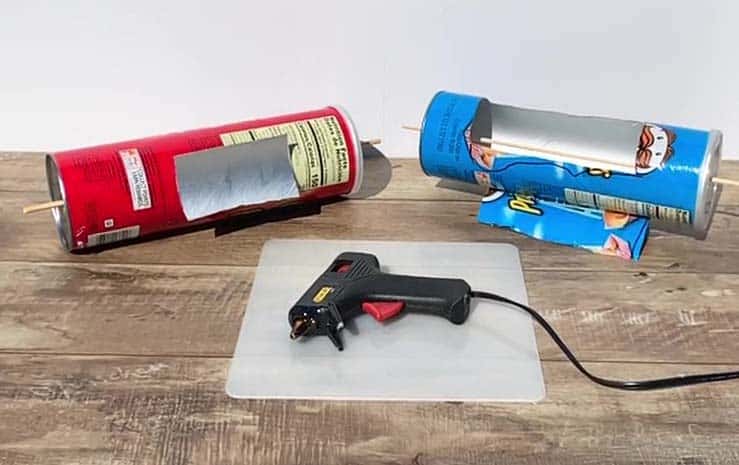
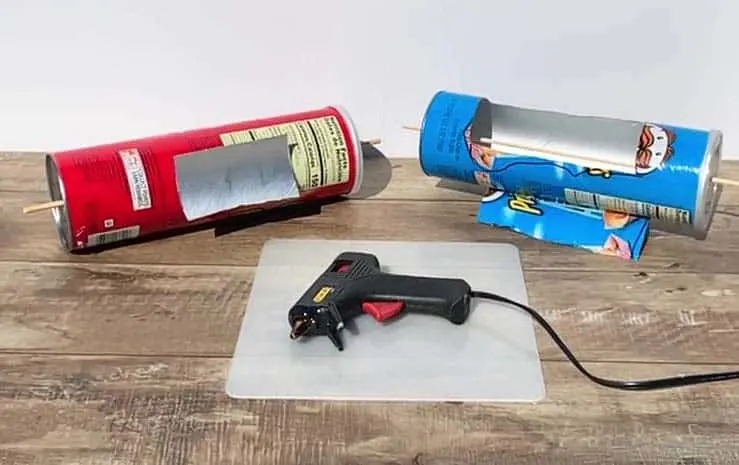
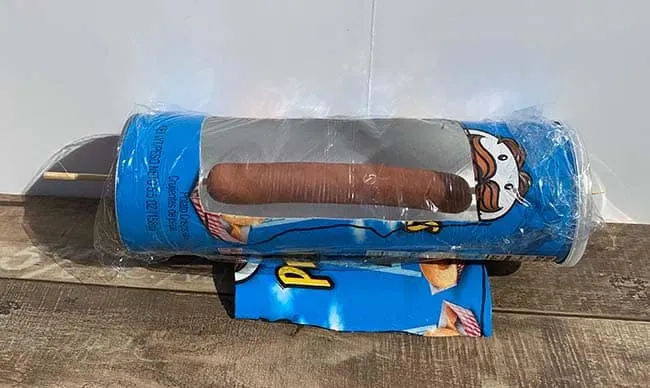
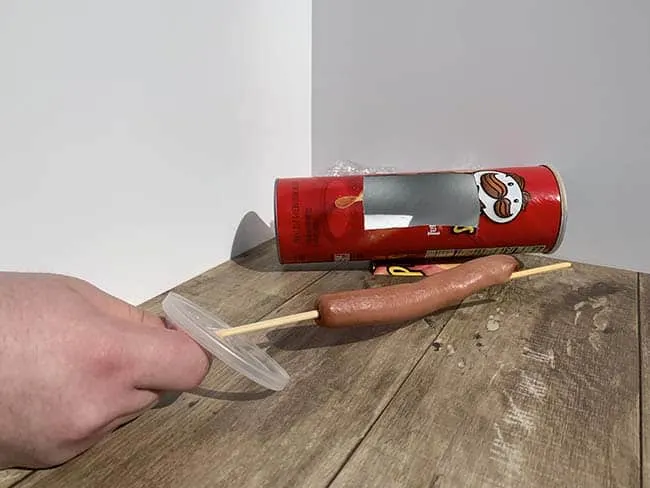
Once you've cleaned the crumbs from your Pringles can, remove the plastic lid and place it on the bottom part of the can. Using the hammer and nail, tap gently in the center of the can on the plastic lid, through the can.
This is where your wooden skewer will go, so be sure to tap a hole large enough to accommodate the skewer. If you need to make the hole larger, simply rotate the nail in the hole until it is the proper width.
In the meantime, place the skewer through the lid and out the other side of the can.
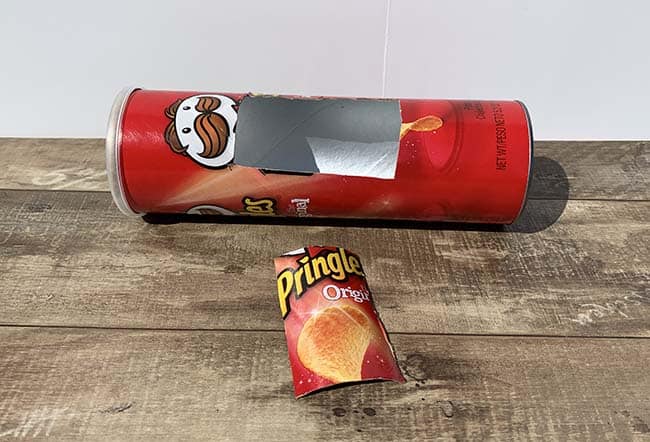
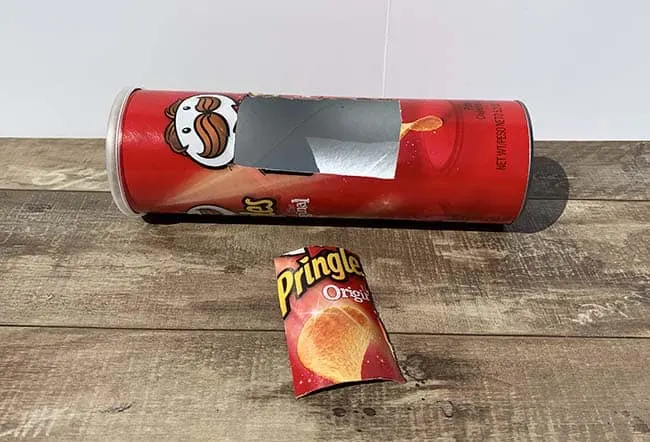
Next, simply measure out a rectangle on one side of the Pringles can; four or five inches by three inches will work. This is where the DIY solar cooker will catch the sun's rays.
Have the Cub Scouts carefully cut out the rectangle with scissors. You could also have an adult volunteer or den leader use an X-Acto Knife or utility knife to make quick work of this task.
With the glue gun, adhere the rectangular section, rounded side up, to the bottom of the cooker, opposite the hole that you cut. This will help to stabilize your DIY solar oven so it doesn't roll around once it's outside in the sunlight.
A parent will need to assist with this.
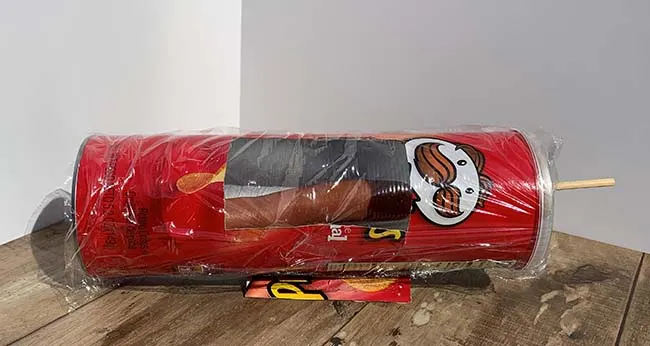
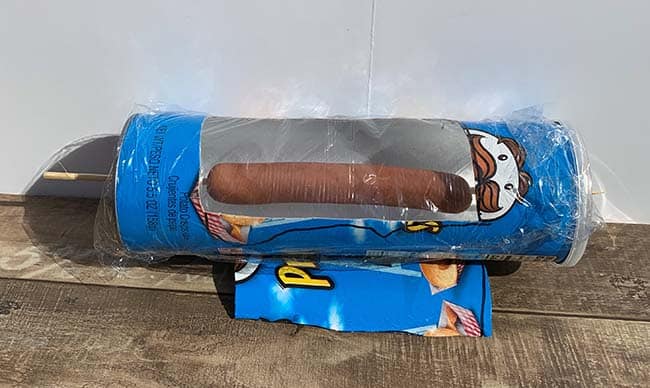
Grab a section of cling wrap and some masking tape and proceed to fully cover the rectangle opening. Make sure all sides are sealed tightly to ensure the hot dog cooker reaches optimal temps once placed in the sun.

Remove the skewer from the can, and skewer it through the hot dog. Return the skewer back to the Pringles can cooker. Place the cooker in direct sunlight until the hot dog is to the desired doneness.

Serve with condiments and of course a side of Pringles chips and enjoy!
And if you want a fun solar-cooked dessert, check out these s'mores made in a pizza box oven.
Teachable Moment: The Science Behind Pringles Can Hot Dog Cooker
Now that you've made a DIY solar oven from a Pringles can, it's not enough to just cook and eat your delicious hot dogs. Turn the activity into a STEM project by talking about how the hot dog cooker works.
By converting sunlight into energy, the surface of the cooker absorbs solar radiation which helps cook the food.
The aluminum surfaces of the Pringles can act as reflective panels that direct the sunlight to the cooking area; in this case the skewer. The clear cling wrap top allows light to come in but as it's sealed, it traps the heat inside the solar oven to speed up the cooking process.
Experiment With Different DIY Solar Cooker Variables
You may want to have the Scouts make their Pringles can hot dog cookers in a variety of ways. Some can include a layer of aluminum foil on the bottom of the can while others leave the can as is. Aluminum foil could also be placed on the inside of the plastic lid to see if that better insulates the hot dog cooker.
Your Cub Scouts may even want to try making other items besides hot dogs in their Pringles can solar oven. Experiment with marshmallows or even chunks of corn on the cob.
Have your Scouts watch the Pringles official video to compare and contrast their results with the results shown in the video.
Did their hot dogs crisp up as much as the Pringles marketing video depicted? Why or why not?
Discuss whether or not they think this video was edited in any way and if so, why would the brand opt to edit the video?
This is a great rabbit hole to get everyone talking about marketing and how sometimes what we see in the media or in commercials, isn't quite reality.
Discuss other examples of where this may occur; for example, the fast-food burger menu pictures vs. what you actually get when you go through the drive-thru.
Cub Scout Adventures Involving Cooking Outdoors
Bear Elective Adventure Bear Picnic Basket 5. With the help of an adult, select a recipe to prepare in the outdoors for your family or den. Help to select the needed ingredients, perhaps from a garden, grocery store, or farmers’ market. Cook and serve your planned meal. Clean up after the preparation and cooking.
Webelos Required Adventure Cast Iron Chef 2. Prepare a balanced meal for your den or family. If possible, use one of these methods for preparation of part of the meal: camp stove, Dutch oven, box oven, solar oven, open campfire, or charcoal grill. Demonstrate an understanding of food safety practices while preparing the meal.
Webelos & Arrow of Light Elective Adventure Castaway 1A. On a campout or outdoor activity with your den or family, cook two different recipes that do not require pots and pans.
Learning how to make a hot dog cooker from a Pringles can is a fun way to encourage teamwork among Scouts. Incorporate a bit of science into your next den meeting and create make the DIY solar oven for a quick, hands-on activity.
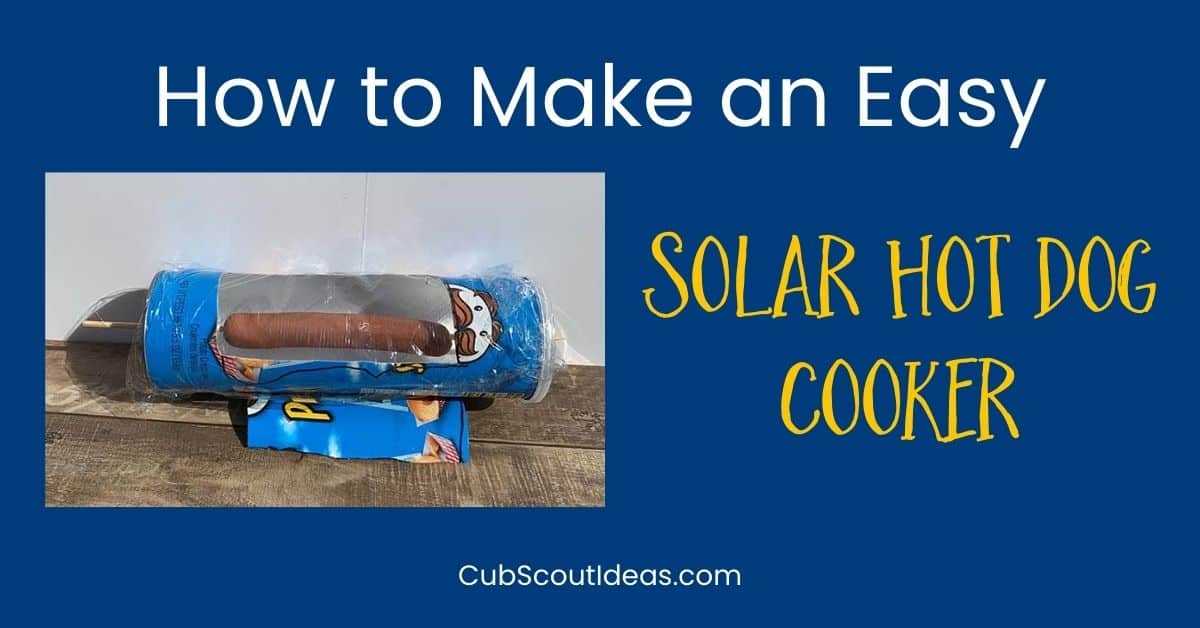
How to Make a Solar Hot Dog Cooker
Learn how to make a solar hot dog cooker from a Pringles can! Super fun and easy project for kids. Perfect STEM activity for Cub Scouts.
Materials
Instructions
- Once you've cleaned the crumbs from your Pringles can, remove the plastic lid and place it on the bottom part of the can.
- Using the hammer and nail, tap gently in the center of the can on the plastic lid, through the can. This is where your wooden skewer will go, so be sure to tap a hole large enough to accommodate the skewer. If you need to make the hole larger, simply rotate the nail in the hole until it is the proper width.
- In the meantime, place the skewer through the lid and out the other side of the can.
- Next, simply measure out a rectangle on one side of the Pringles can; four or five inches by three inches will work. This is where the DIY solar cooker will catch the sun's rays.
- Have the Cub Scouts carefully cut out the rectangle with scissors. You could also have an adult volunteer or den leader use an X-Acto Knife or utility knife to make quick work of this task.
- A parent will need to assist with this. With the glue gun, adhere the rectangular section, rounded side up, to the bottom of the cooker, opposite the hole that you cut. This will help to stabilize your DIY solar oven so it doesn't roll around once it's outside in the sunlight.
- Grab a section of cling wrap and some masking tape and proceed to fully cover the rectangle opening. Make sure all sides are sealed tightly to ensure the hot dog cooker reaches optimal temps once placed in the sun.
- Remove the skewer from the can, and skewer it through the hot dog. Return the skewer back to the Pringles can cooker.
- Place the cooker in direct sunlight until the hot dog is to the desired doneness.
- Serve with condiments and of course a side of Pringles chips and enjoy!
Yours in Scouting,
Sherry
P.S. Check out these fun outdoor cooking ideas for kids.


How to Make a Fun and Easy Pizza Box Oven for Kids
Tuesday 16th of February 2021
[…] something to eat before dessert? Use this solar hot dog cooker to make your main dish […]