


Looking for a fun wood project for Cub Scouts? Check out this handmade wooden candy dispenser! Great for the Baloo the Builder and Built It adventures.
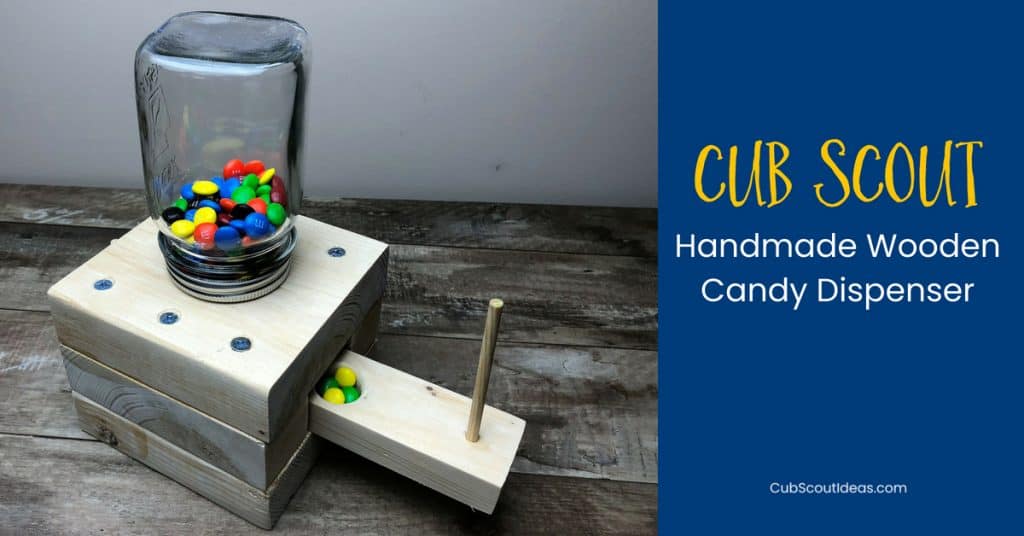

How to build wood projects is one of the skills that Cub Scouts learn. They'll be super proud of the handmade wooden candy dispenser that they can make with these instructions.
Bear Elective Adventure Baloo the Builder Requirement 3. Assemble your materials, and build one useful project and one fun project using wood.
Webelos and Arrow of Light Elective Adventure Build It Requirement 2. With the guidance of your Webelos den leader, parent, or guardian, select a carpentry project and build it.
Note: The Guide to Safe Scouting prohibits our Cub Scouts from using power tools, so this project will require the assistance of an adult.
The Baloo the Builder adventure has the Cub Scouts building two wood projects–one useful and one fun. I have several useful wood projects on the blog like these:
Now, the Bears need to make a fun wood project. And what's more fun than making your own wooden candy dispenser?
Webelos and Arrows of Light need to make one carpentry project, and this fun project is perfect for them too.
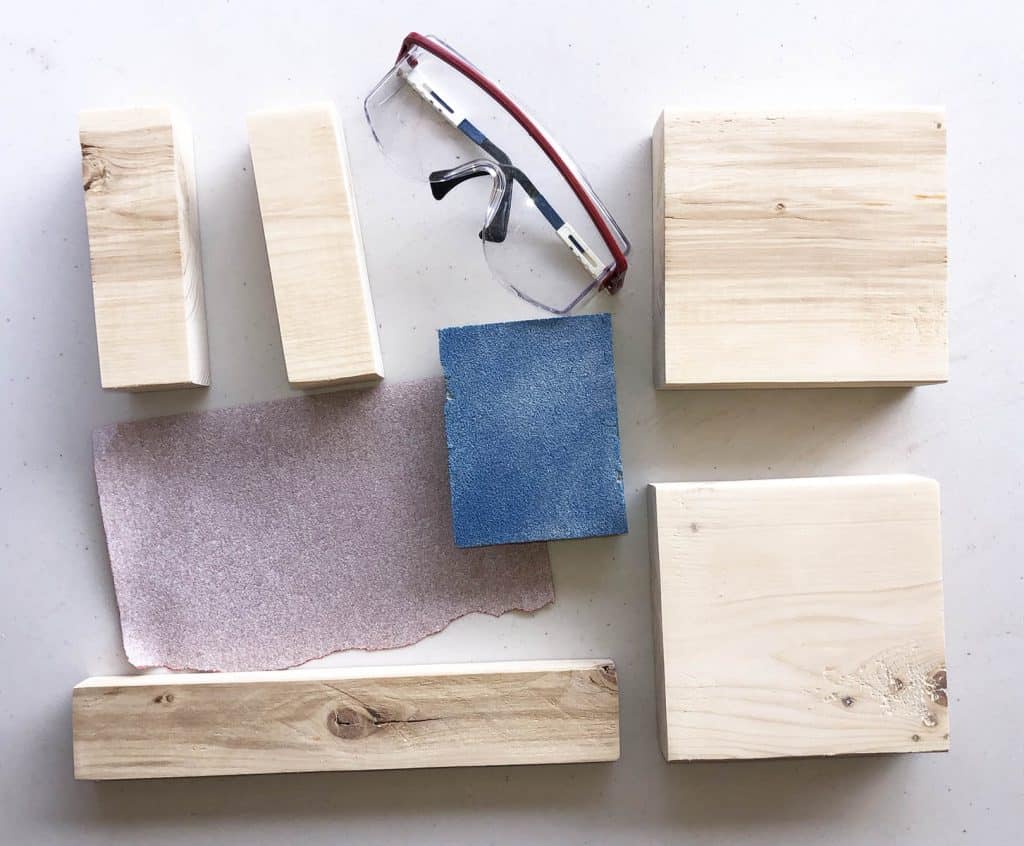
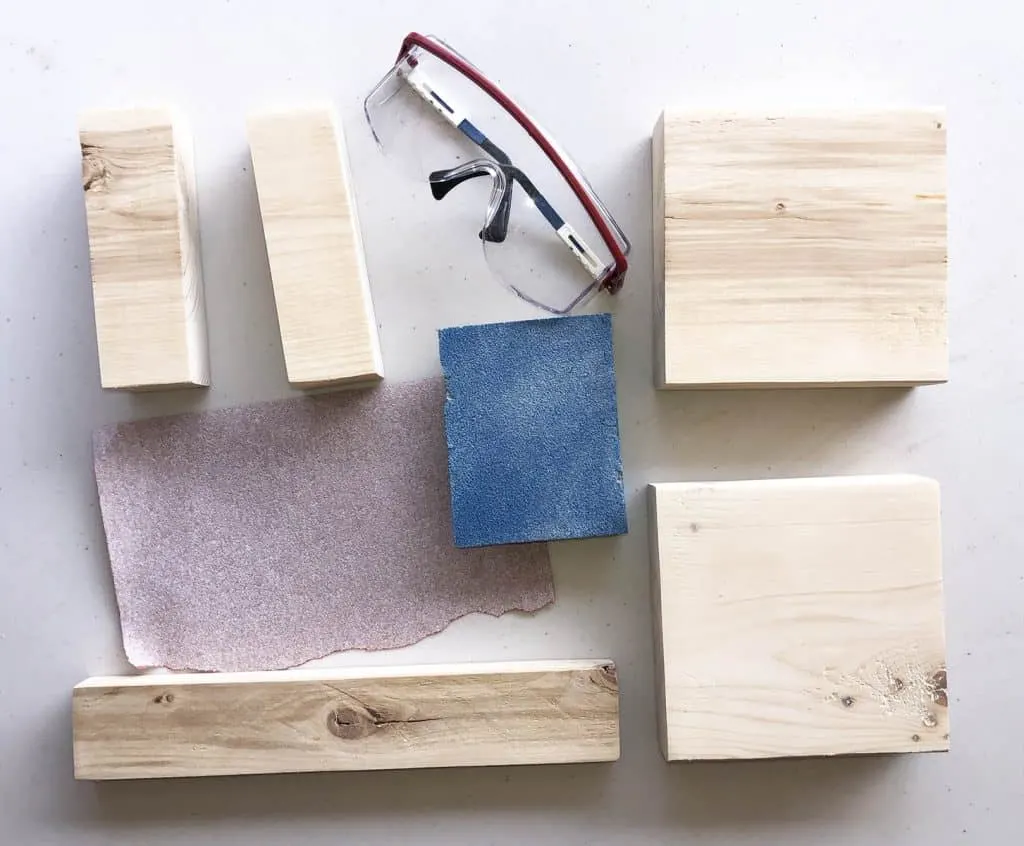
Supplies Needed for Handmade Wooden Candy Dispenser
- 2″ x 6″ board approximately 2 feet long
- 1/4″ dowel approximately 3″ long
- 1/4″ dowel approximately 1 1/2″ long
- 12 – 2 1/2″ wood screws
- 4 small nails with flat heads
- Pint Mason jar with metal ring
Equipment Needed for Handmade Wooden Candy Dispenser
You'll also need these pieces of equipment for the Cub Scouts.
These items should only be used by an adult.
- Drill
- Drill bit for pre-drilling holes for wood screws
- 1″ spade bit (drill press can also be used)
- Countersink bit
How to Build a Handmade Wooden Candy Dispenser
Before beginning this project, you may want to do the tool skills exercises with your den so that they'll know how to use the tools in this project.
A 2″ x 6″ is actually about 1 1/2″ by 5 1/2″. Have the Cub Scouts measure the wood to demonstrate this.
Cut two pieces that are 5 1/2″ x 5 1/2″. These will be the top and bottom of the candy dispenser.
After these pieces are cut, have the Cubs use a measuring tape or ruler as a guide to draw an X across one of the pieces of wood.

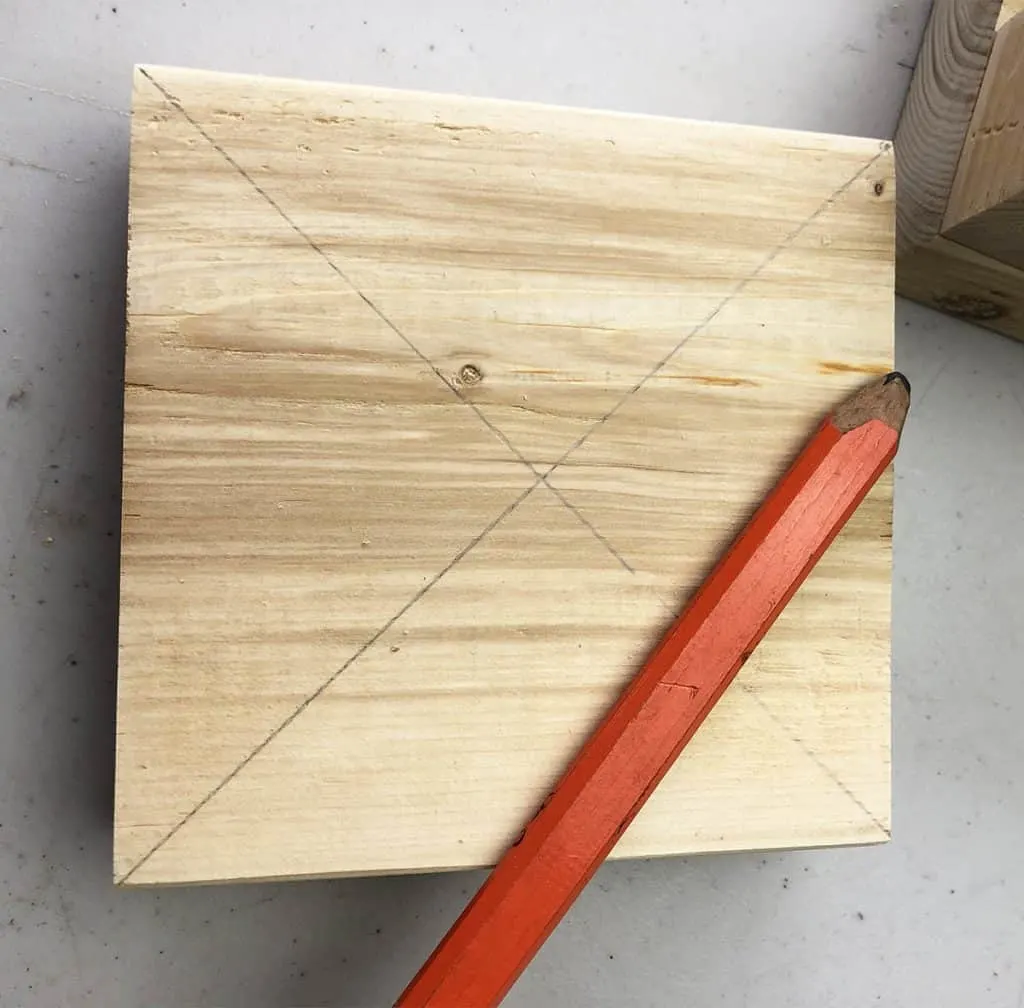
Have the children write their names on their pieces of wood. Give the pieces with the X to another adult who can use the drill with the spade bit or a drill press to drill a hole all the way through the center of the wood.
While the adult is drilling the holes, the Cub Scouts should cut two pieces of board to 1 3/4″ x 5 1/2″. These will be the side pieces.
Glue the two side pieces to the 5 1/2″ piece that doesn't have the hole in it, and clamp them together. Set aside to dry.
Next, cut the board to 1 7/8″ x 11″ for the slide. The kids will need to sand either the top or bottom of the slide quite a bit so that it will slide smoothly.
When the glued pieces have dried, have an adult drill 6 pilot holes (3 on each side) and use the countersink drill bit on each.
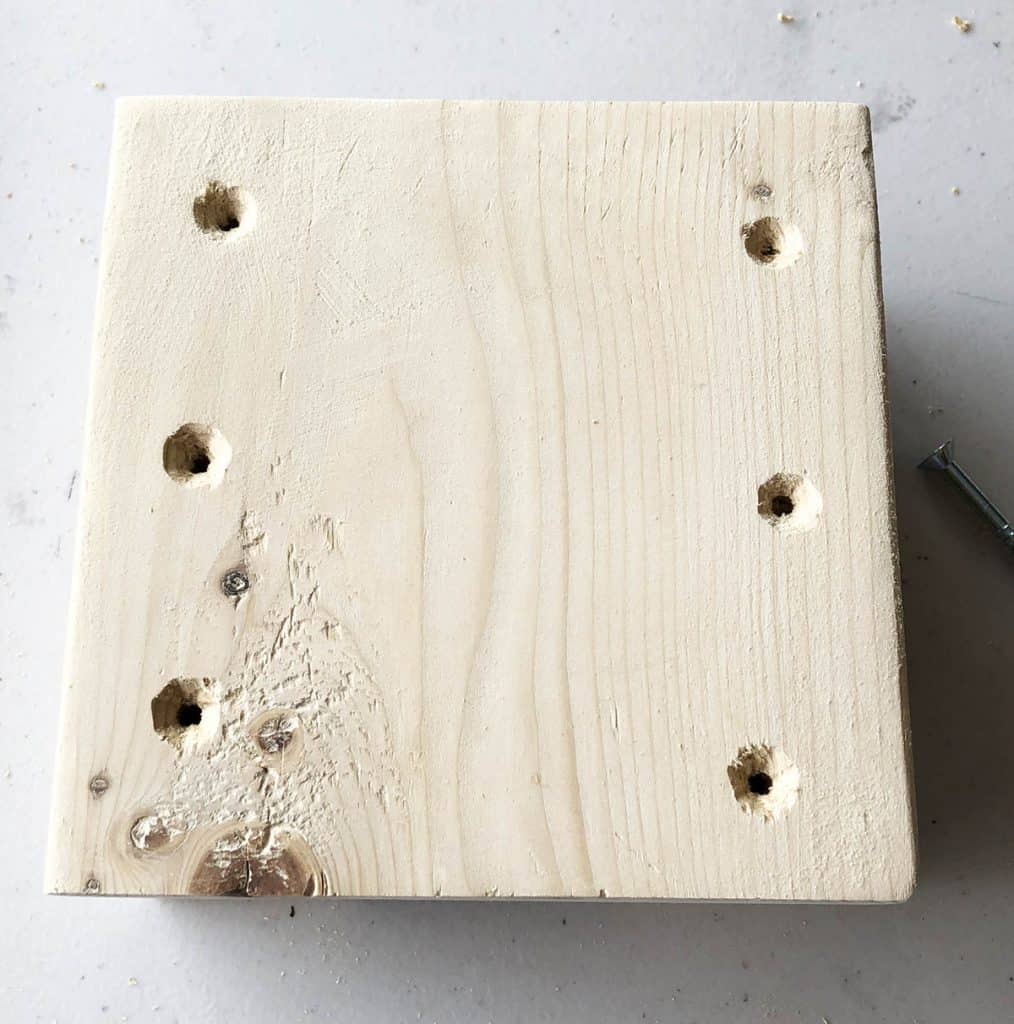
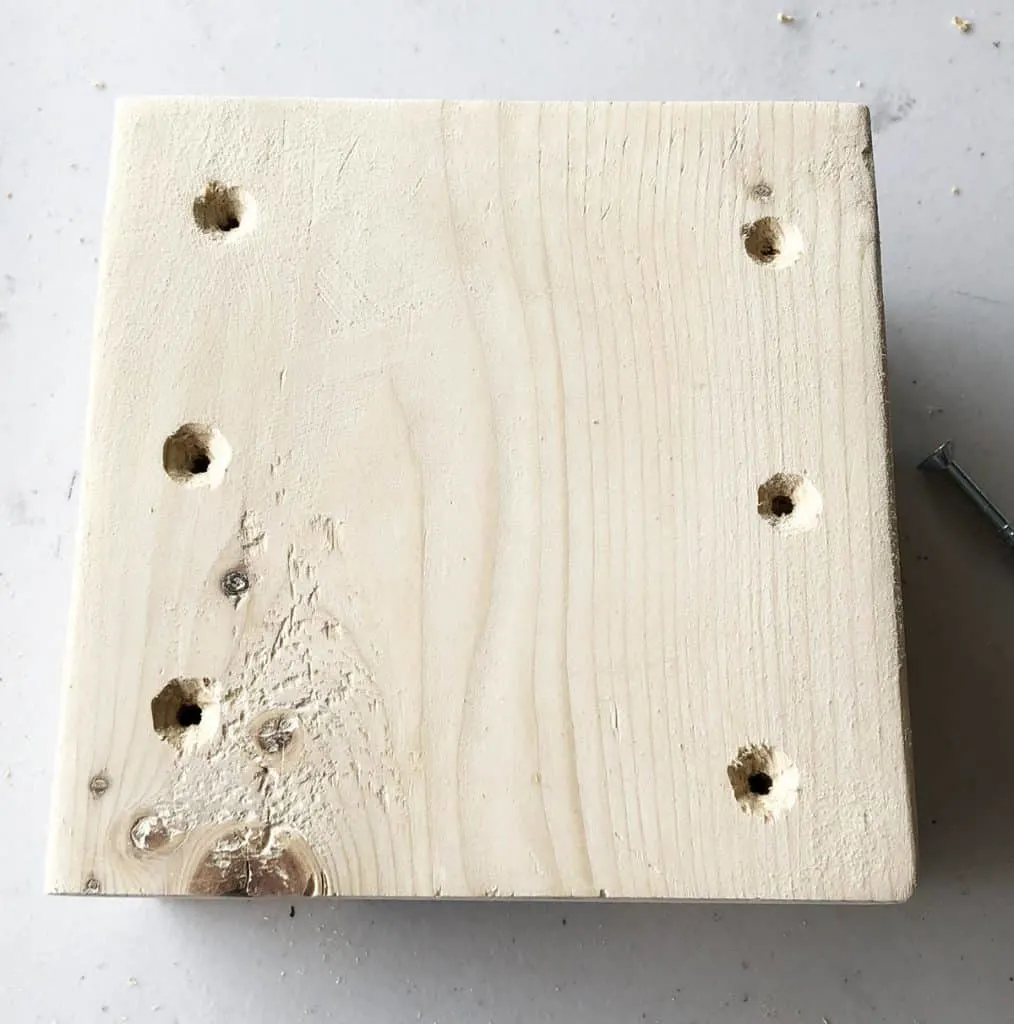
You may want to explain what a countersink does.
The Cubs will then screw the wood screws into the pilot holes.
Next, glue the 5 1/2″ piece with the hole onto the sides, clamp, and set aside to dry.
Have an adult drill a 1/4″ hole about 3/4″ from the front of the slide for the 3″ peg and another 1/4″ hole about 1/2″ from the back of the slide for the 1 1/2″ peg.
The kids can glue the longer peg into the front hole but don't glue the peg in the back hole.
While the glue is drying, the Cub Scouts can sand their slide more.
When the glue has dried for the top, have an adult drill the pilot holes and countersink.
The Cubs can then screw the wood screws into those pilot holes.
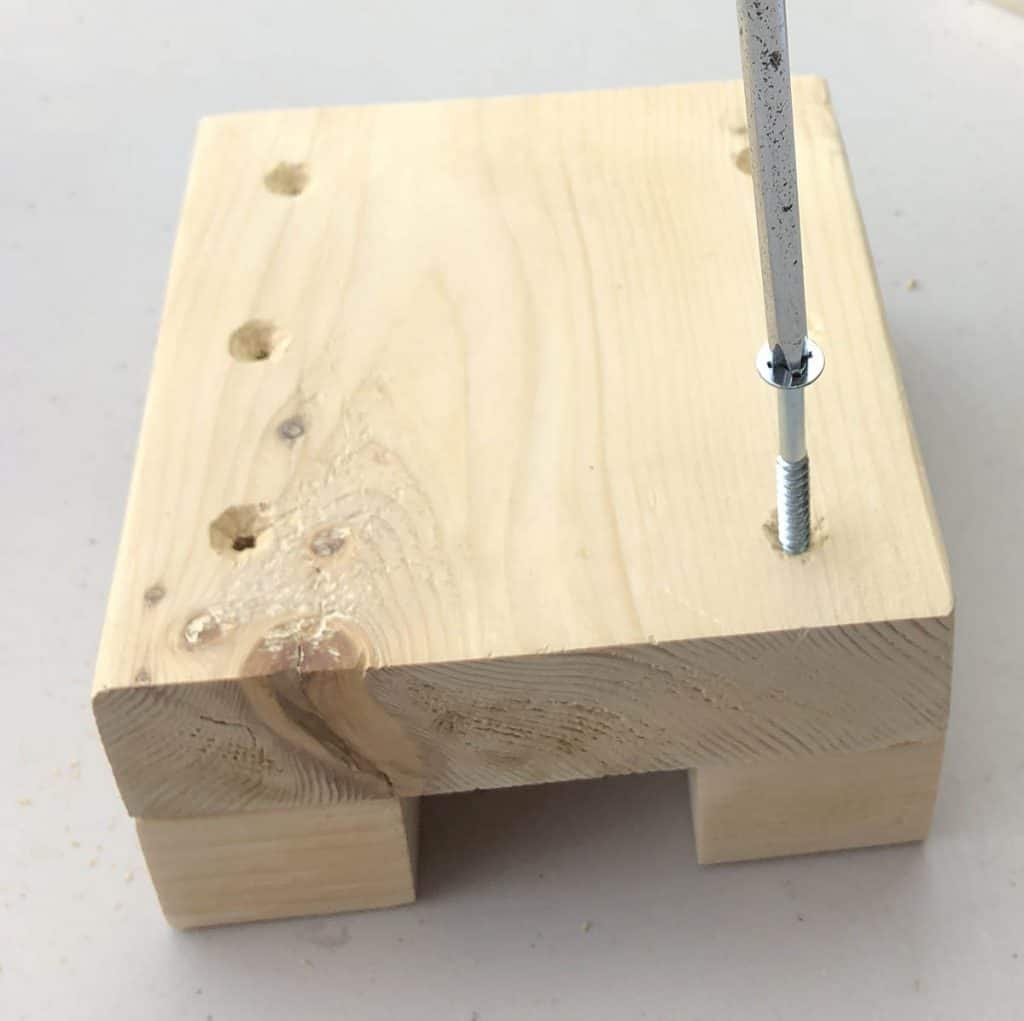
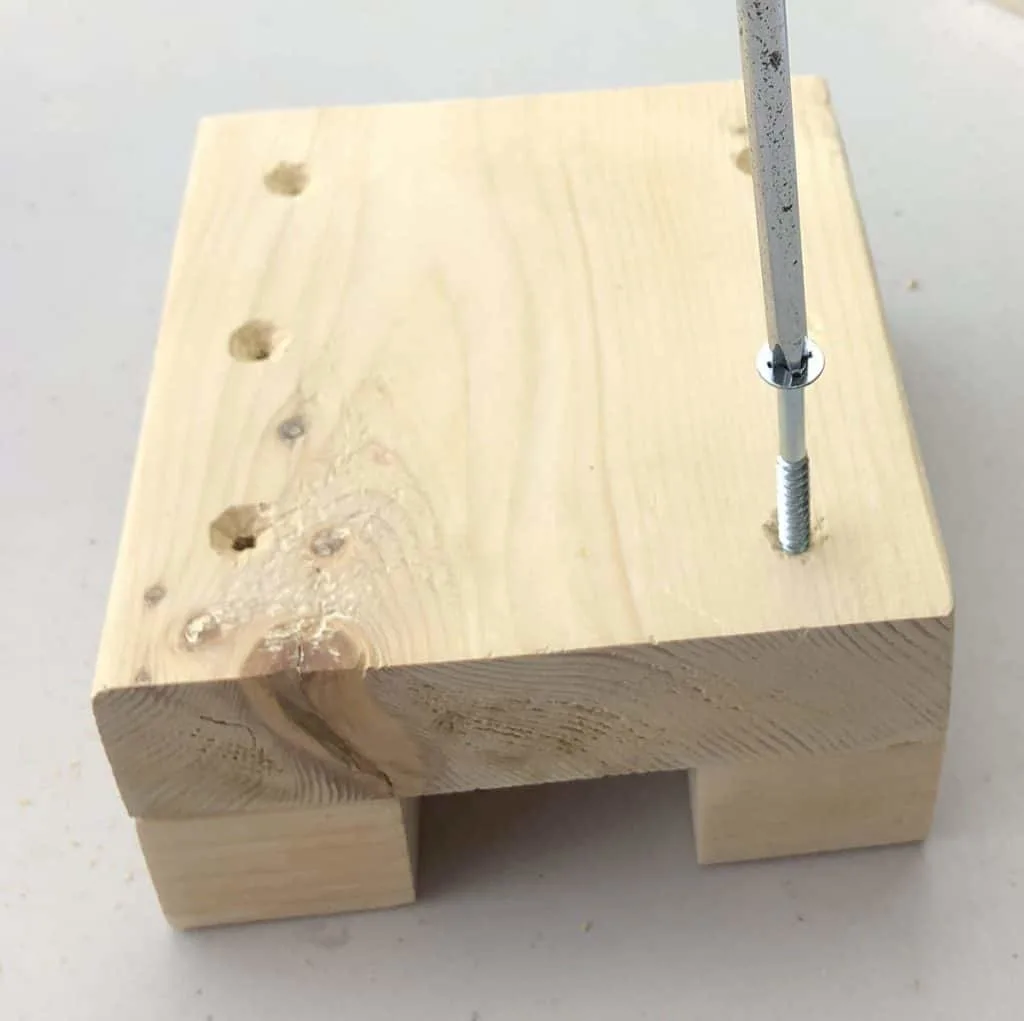
After the top, sides, and bottom are all screwed together, insert the slide into the hole, and check that it slides smoothly. If it doesn't, sand the top and bottom more.
Insert the slide into the hole again, and push it all the way back until it reaches the 3″ front peg.
Put the pencil in the hole on the top piece, and draw a circle onto the slide.
Give the slides to an adult who will use the spade bit or drill press to drill a hole about 3/8″ deep into the slide.
If the Scouts have their whittling chip, they can bevel the edge of the hole in the slide with a pocketknife then sand smooth. If they don't have their whittling chip, have an adult bevel the edge.
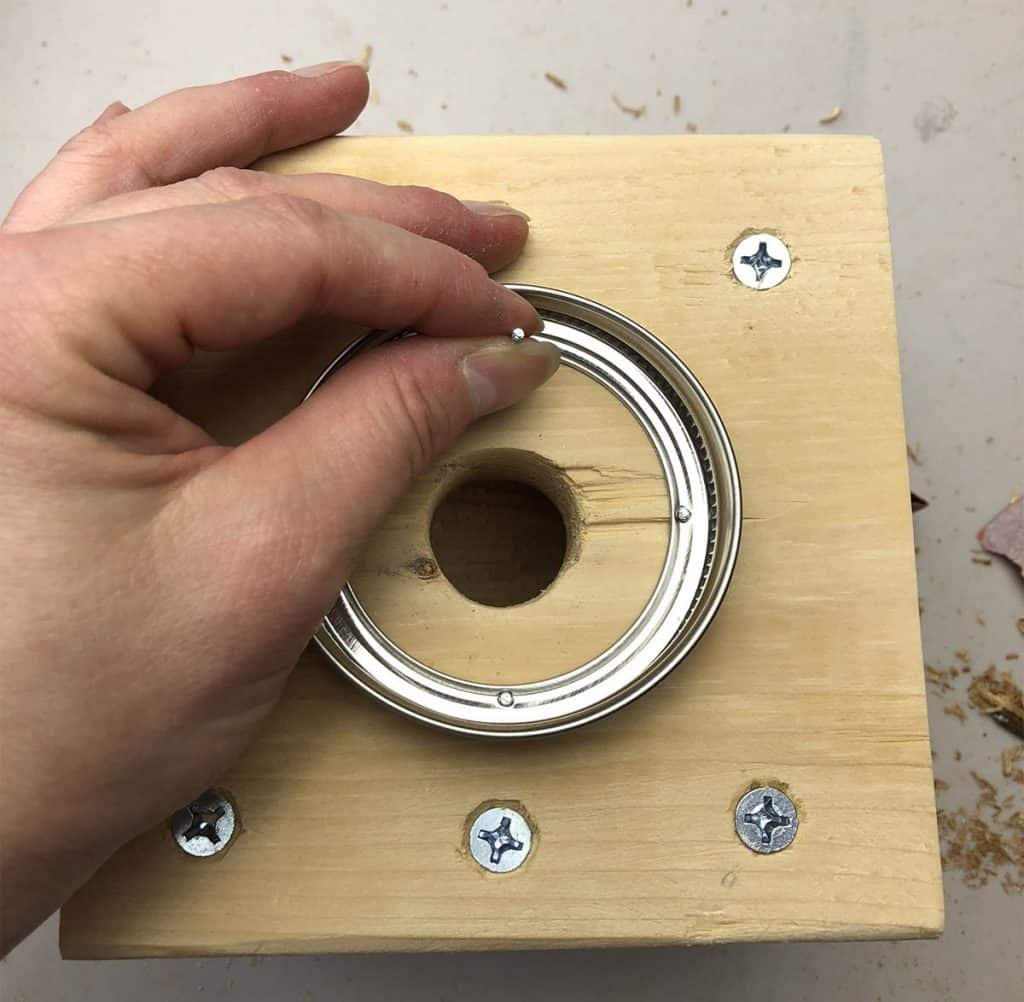
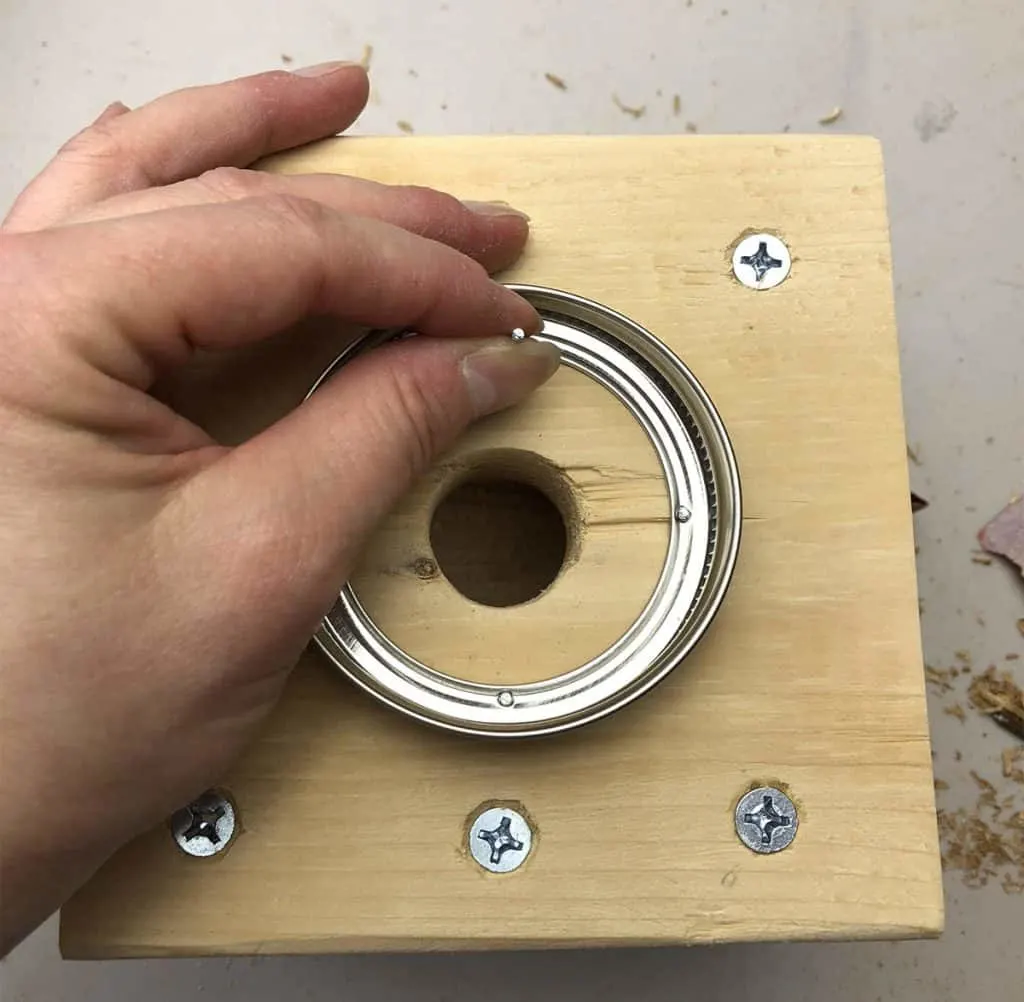
Attach the jar ring to the top board with the small nails. If needed, an adult can drill very small pilot holes through the ring and into the wood.
Finally, fill the jar with candy. You can use M&Ms, Skittles, jelly beans, or gumballs.
Turn the dispenser upside down, and carefully screw the lid onto the jar. Turn the dispenser right side up, and enjoy your candy!
What kind of candy will you put in your handmade candy dispenser?
Yours in Scouting,
Sherry
P.S. The Baloo the Builder adventure is one of the requirements for the Cub Scout Nova award, Swing!

Helpful Hints for Planning Cub Scout Projects - Cub Scout Ideas
Tuesday 11th of January 2022
[…] Instructions for making this cool candy dispenser […]
Brian Miller
Tuesday 8th of June 2021
They can use a manual hand drill, though. Depending on the sharpness of the drill bit and type of wood used, it wouldn’t take them long for the necessary holes. Fiskar’s make an inexpensive one, but if you ask around , someone’s bound to have one. Teach them well!
The 10 Best Cub Scout Recruitment Display Ideas | Cub Scout Ideas
Wednesday 14th of August 2019
[…] did something similar for our recruitment night/round-up. I brought the candy dispenser, bookends, chess set, duct tape wallet, catapult, paracord bracelet, and wood projects that my boys […]